The straight leg pull-back is done lying on your back, so the floor supports your spine and your neck can stay relaxed. You feel the stretch along the back of the thigh and down into the calf.
The goal is a clear but comfortable stretch. Your leg doesn't need to reach vertical. Bend the knee if you need to, loop a towel around your foot if you can't reach, and keep breathing slowly.
Quick Facts: Straight Leg Pull-Back
- Equipment needed: None; a towel is optional
- Difficulty: Intermediate (as rated in the FitCraft app)
- Modality: Static stretch, held lying on your back
- Body region: Backs of the thighs (hamstrings) and calves, both stretched
Muscles Stretched
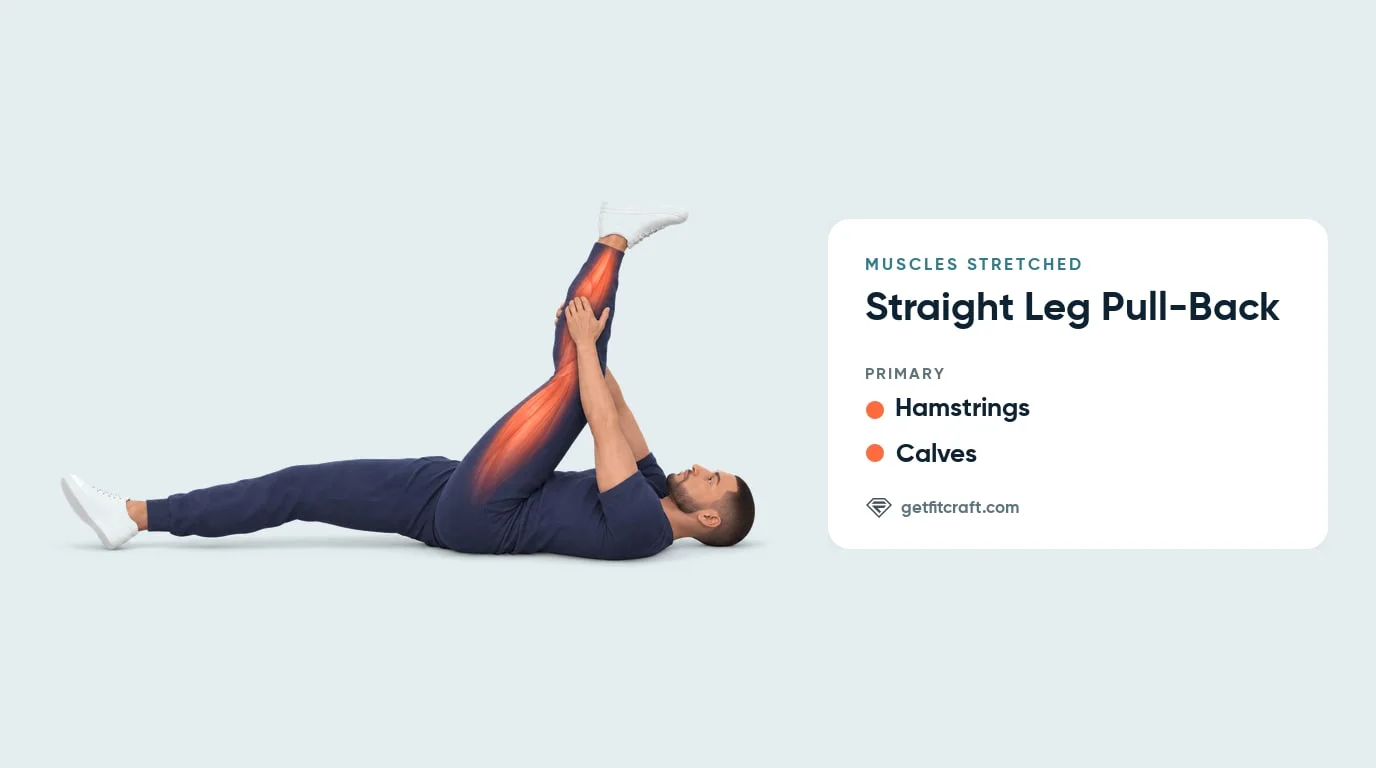
Muscles stretched: the hamstrings and the calves, both main targets. The straight leg pull-back is a stretch, not a strength exercise. The hamstrings run down the back of your thigh, and they lengthen as your hip folds toward your chest while the knee stays nearly straight. The calf runs down the back of your lower leg and crosses both the knee and the ankle, so it lengthens when the raised knee is long, and more so as you draw your toes toward your shin.
How the knee and foot change the stretch: a straighter knee stretches the hamstrings more, and a more bent knee eases the stretch. Letting the foot relax keeps the calf stretch gentle, while drawing the toes toward your shin adds to it. Those two changes are the main ways to make the stretch easier or harder.
Where you should feel it: along the back of your raised thigh and down into your calf. You shouldn't feel pain behind your knee, in your lower back or in your neck, and any pain there means let the leg go and stop.
Step-by-Step: How to Do the Straight Leg Pull-Back
- Lie flat on your back. Lie with both legs long on the floor and your head resting down. Relax your shoulders and neck, and take a breath before you move.
- Raise one leg and hold it. Lift one leg toward the ceiling and hold it with both hands behind the calf or the back of the thigh near the knee, arms long. If you can't reach without lifting your head or shoulders, loop a towel around your foot and hold the ends instead.
- Draw the leg toward you gently. Keeping your head and shoulders on the floor, gently draw the raised leg toward you until you feel a stretch along the back of the thigh and down into the calf. Pull gently and never yank or bounce.
- Set the knee, foot and other leg. Keep the raised knee straight or softly bent, and let the foot relax or draw the toes gently toward you. Let the other leg rest long on the floor. If your lower back or the front of that hip feels tight, bend that knee and put the foot flat.
- Hold, breathe, and switch. Hold while breathing slowly and evenly, for the time your workout sets; about 15 to 30 seconds at a time is a good stretch. Lower the leg with control and switch sides.
Get this exercise in a personalized workout
FitCraft, our mobile fitness app, uses its AI coach Ty to program mobility work like this into your plan at the right volume and intensity, based on your level, goals, and equipment. Ty was designed and trained by Domenic Angelino, MPH (Brown University) and NSCA-CSCS, with research published in the Journal of Strength and Conditioning Research and Medicine & Science in Sports & Exercise.
Take the Free Assessment Free • 2 minutes • No credit card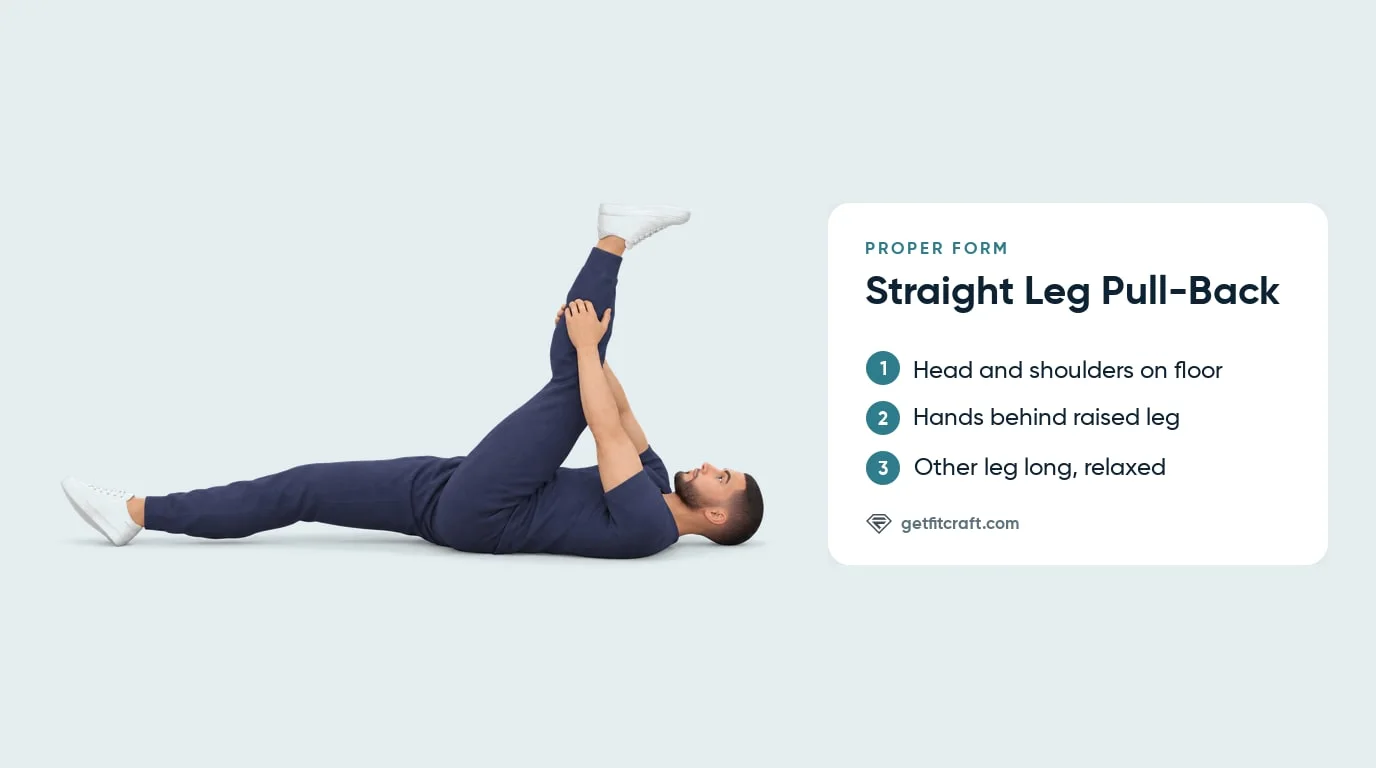
Common Mistakes (and How to Fix Them)
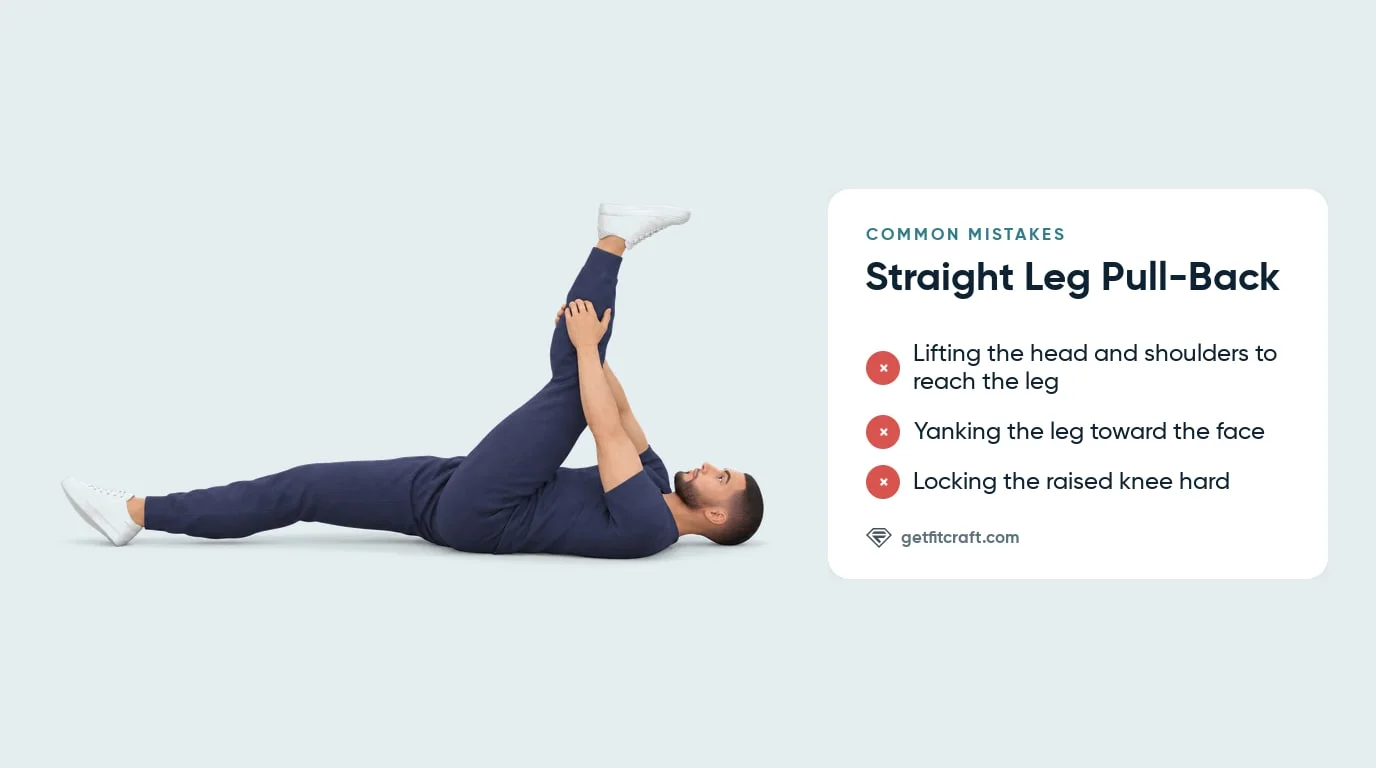
Lifting the Head and Shoulders
What it looks like: You crunch up to reach the leg, with the neck and shoulders working hard.
Why it's a problem: You add neck and shoulder tension without adding to the stretch.
The fix: Hold behind your thigh instead of your calf, or loop a towel around your foot, so your arms can stay long and your head can stay down.
Yanking the Leg
What it looks like: You yank or bounce the leg toward your chest and try to force a bigger range.
Why it's a problem: Yanking or bouncing can strain the back of your thigh.
The fix: Pull gently until you feel a clear but comfortable stretch, then hold still and breathe slowly.
Locking the Knee Hard
What it looks like: You force the knee back to make the leg look perfectly straight.
Why it's a problem: Forcing the knee straight makes the stretch harsher and harder to control, and any pain behind the knee means stop.
The fix: Keep the knee straight or softly bent. A bent knee is never wrong in this stretch.
Lifting the Hips or the Other Leg
What it looks like: The resting leg floats up, or your hips lift off the floor, as the raised leg comes closer.
Why it's a problem: You lose the anchor that helps the pelvis stay steady.
The fix: Ease the raised leg away a little until your hips stay down, and let the resting leg lie long on the floor. If your lower back or the front of that hip feels tight, bend that knee and put the foot flat.
Holding Your Breath
What it looks like: You hold your breath while you pull the leg in.
Why it's a problem: A static stretch is held relaxed, and holding your breath keeps you tense.
The fix: Breathe slowly and evenly while you hold, and let your leg relax into the stretch.
Straight Leg Pull-Back Variations: Easier and Harder Versions
Towel-Assisted Straight Leg Pull-Back (Easier)
Loop a towel around your foot and hold the ends, so your head and shoulders can stay relaxed on the floor. This is the best starting point if reaching your leg makes your upper body tense. The FitCraft app uses no equipment, so the towel is optional.
Bent-Knee Pull-Back (Easier)
Bend the knee of your raised leg more and hold behind your thigh, so the stretch stays gentle. You can also bend your other knee and rest that foot flat on the floor.
Straight Leg Pull-Back (Standard, Intermediate in the App)
The version in the steps above: lying flat, one leg raised and held behind the calf or thigh, knee straight or softly bent, the other leg long on the floor. The FitCraft app has it for each leg and rates both Intermediate.
Flexed-Foot Pull-Back (Harder)
Pull the toes gently toward your shin during the hold. With the knee long, this adds more stretch in the calf. Straightening the raised knee a little more, only as far as the stretch stays comfortable, also makes it harder. Tingling or numbness down the leg means stop.
Downward Dog (Harder)
Downward dog gives a bigger stretch down the backs of both legs at once. The FitCraft app has it as a separate exercise.
When to Avoid or Modify Straight Leg Pull-Back
A stretch along the back of your thigh and into your calf is normal in the straight leg pull-back. Any pain behind your knee, in your lower back, hip or neck means let the leg go and stop, and so does tingling, numbness or pain running down your leg. If any of the following applies to you, see a doctor or physical therapist before you do this stretch.
- Sciatica, or numbness, tingling or pain running down your leg. See a doctor or physical therapist before you do this stretch, and ask them which exercises suit you. Tingling, numbness or pain running down your leg during the stretch means stop right away.
- Recent hamstring strain. See a doctor or physical therapist before you do this stretch, and ask them which exercises suit you. Any pain in the back of your thigh means stop.
- Lower back pain or a back injury. See a doctor or physical therapist before you do this stretch. Any lower back pain during the stretch means stop.
- Hypermobility or Ehlers-Danlos syndrome. Ask your doctor or physical therapist whether stretching fits your plan. If they clear you, keep the stretch mild and never lock the knee. Any joint pain means stop.
- Pregnancy. Check with your doctor or midwife before you do this stretch, and ask them which version fits each stage of your pregnancy. Any pain in your back, belly or pelvis means stop.
- Recent hip, knee, or spine surgery. Get clearance from your surgeon or physical therapist before you do this stretch. Any pain in the joint or your back means stop.
Related Exercises
These pair well with the straight leg pull-back:
- Other stretches for the backs of the legs: Downward Dog stretches the backs of both legs at once, and Half Pigeon stretches the hips and the back of the thigh from a different position.
- Gentle spine movement: Cat-Cow and Seated Cat-Cow help the spine move gently before or after hamstring work.
- Inner thighs and hips: Butterfly Pose and Z-Sit stretch the inner thighs and hips.
- Strength for the backs of your legs: Glute Bridges and Calf Raises strengthen the backs of your legs.
How to Program Straight Leg Pull-Back
Stretching follows different rules from resistance training: slow, relaxed holds and steady breathing matter more than load. The American College of Sports Medicine's guidance on flexibility exercise recommends stretching each major muscle group on at least two days a week, for about 60 seconds in total per exercise (Garber et al., 2011). The table below is a practical starting point.
| Version | Hold per leg | Total per leg | Frequency |
|---|---|---|---|
| Easier (bent knee, a towel, or the other knee bent) | About 15-30 seconds, breathing slowly | About 1 minute (2-4 holds) | At least 2 days a week |
| Intermediate (the standard pull-back, as rated in the app) | About 15-30 seconds, breathing slowly | About 1 minute (2-4 holds) | At least 2 days a week |
| Harder (straighter knee, toes toward the shin) | About 15-30 seconds, breathing slowly | About 1 minute (2-4 holds) | At least 2 days a week |
Where in your workout: use short, gentle holds after a warm-up if you need more range before training. It also fits a cool-down or a short stretch on a rest day. Hold for the time your workout sets.
Form over hold time: ease off when your head lifts, your hips or the other leg lift off the floor, or you start holding your breath. Any pain behind your knee, in your lower back or neck, or any tingling or numbness down the leg, means stop.
How FitCraft Programs This Exercise
FitCraft maps your level, goals, and equipment during the diagnostic and builds a plan around them. The app has the straight leg pull-back for each leg, both rated Intermediate, and can include them in your plan.
Its 3D demonstrations show the app's version: lying on your back with your head down, one leg raised and held just below the knee with long arms, the other leg long and low. No strap or towel is needed.
Frequently Asked Questions
What muscles does the straight leg pull-back stretch?
The straight leg pull-back stretches two muscle groups: the hamstrings and the calves. The hamstrings, along the back of your thigh, lengthen as your hip folds with your knee nearly straight. The calf, down the back of your lower leg, lengthens while your knee stays long, and more so as you draw your toes toward your shin.
My leg will not go straight. Am I doing it wrong?
No. Straight or softly bent are both fine. A straighter knee stretches more, so bend it as much as you need to keep the stretch comfortable. If you can't reach your leg without lifting your head, loop a towel around your foot.
How long should I hold the straight leg pull-back?
Hold for the time your workout sets, then switch legs. About 15 to 30 seconds at a time is a good stretch, and about a minute in total per leg is plenty. American College of Sports Medicine guidance on flexibility exercise suggests about 60 seconds in total per stretch on at least two days a week (Garber et al., 2011).
What should my foot do in the straight leg pull-back?
Let it relax, or pull your toes gently toward you. With your knee long, pulling your toes toward you adds more stretch in your calf.
Can I do the straight leg pull-back with sciatica?
Not while you have symptoms. If you have sciatica, or pain, numbness or tingling running down your leg, see a doctor or physical therapist before you do this stretch, and ask them which exercises suit you. Tingling, numbness or pain running down your leg during the stretch means stop right away.