Warrior 3 is useful because it gives fast feedback. If your standing foot grips, your gaze drifts, or your lifted leg goes passive, the pose tells you right away.
It trains single-leg balance, control of the hip hinge, endurance in your glutes, hamstrings and back, and calm breathing while you balance.
Quick Facts: Warrior 3 Pose
- Equipment needed: None; yoga mat, wall, chair, or blocks optional
- Difficulty: Expert in the FitCraft app (hands on a wall, a chair or blocks make it easier)
- Modality: Yoga, balance, mobility and strength holds
- Body region: Glutes, backs of the thighs, back and shoulders
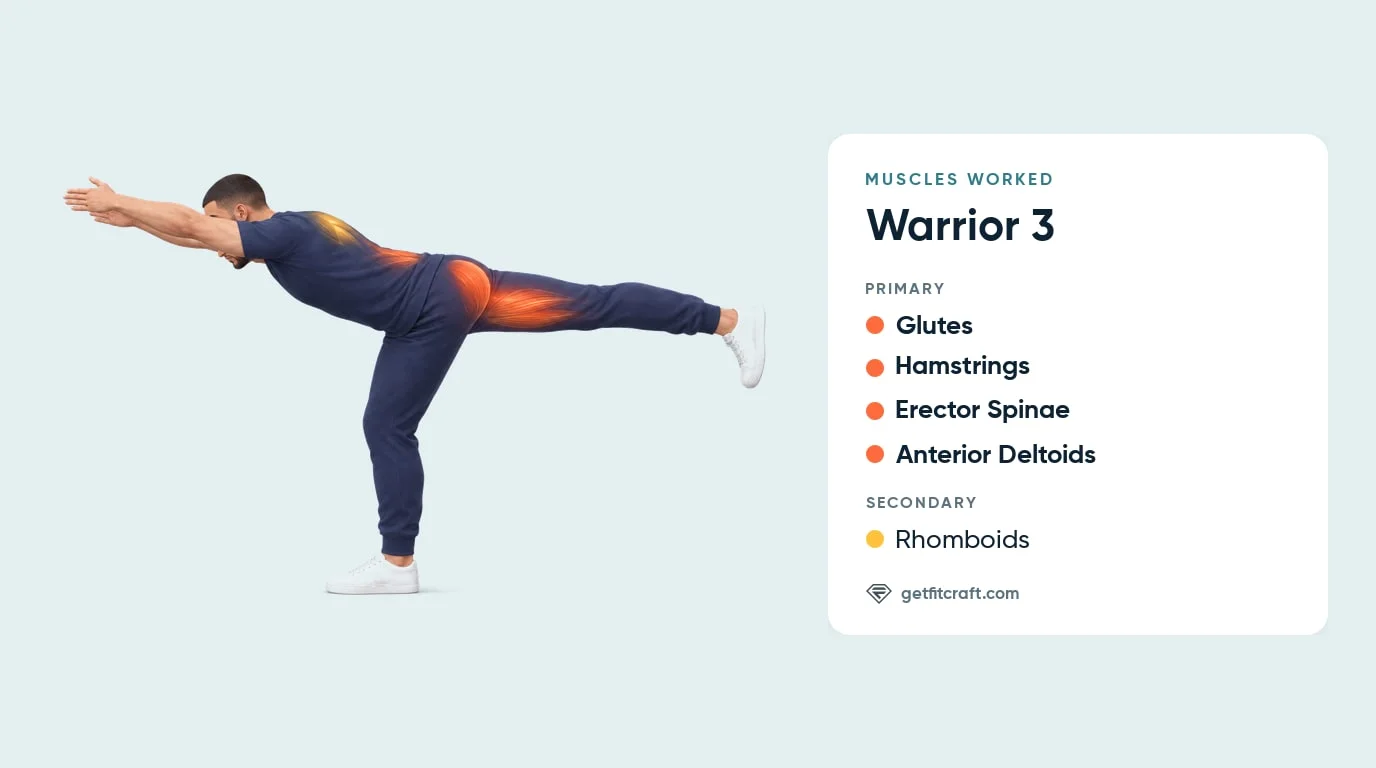
Muscles Worked
Primary muscles: the glutes, hamstrings, erector spinae and anterior deltoids. The glutes and hamstrings of your standing leg hold your hip as you hinge forward, and those of your lifted leg keep the back leg lifted instead of letting it sag. Once you reach the hold, they keep you in position without moving. The erector spinae, the muscles along your spine, keep your back flat as your torso tips forward. The anterior deltoids, at the front of your shoulders, hold your arms reaching forward beside your ears.
Secondary muscles: the rhomboids, between your shoulder blades, draw your shoulder blades back as your chest lifts.
Where you should feel it: in your glutes and the backs of your thighs, along your spine, at the front of your shoulders and between your shoulder blades. A stretch behind your standing leg is normal. Your lower back and knee should never hurt, and any pain there means stop.
How to Do Warrior 3 Pose (Step-by-Step)
Step 1: Start Standing Tall
Stand with your feet hip-width apart. Shift your weight onto one foot, spread your toes and press your whole foot into the floor. Keep the standing knee straight but not locked, or softly bent, pointing forward, and reach both arms forward or overhead.
Tip: never lock the standing knee; a soft bend is fine and helps your balance.
Step 2: Hinge From the Standing Hip
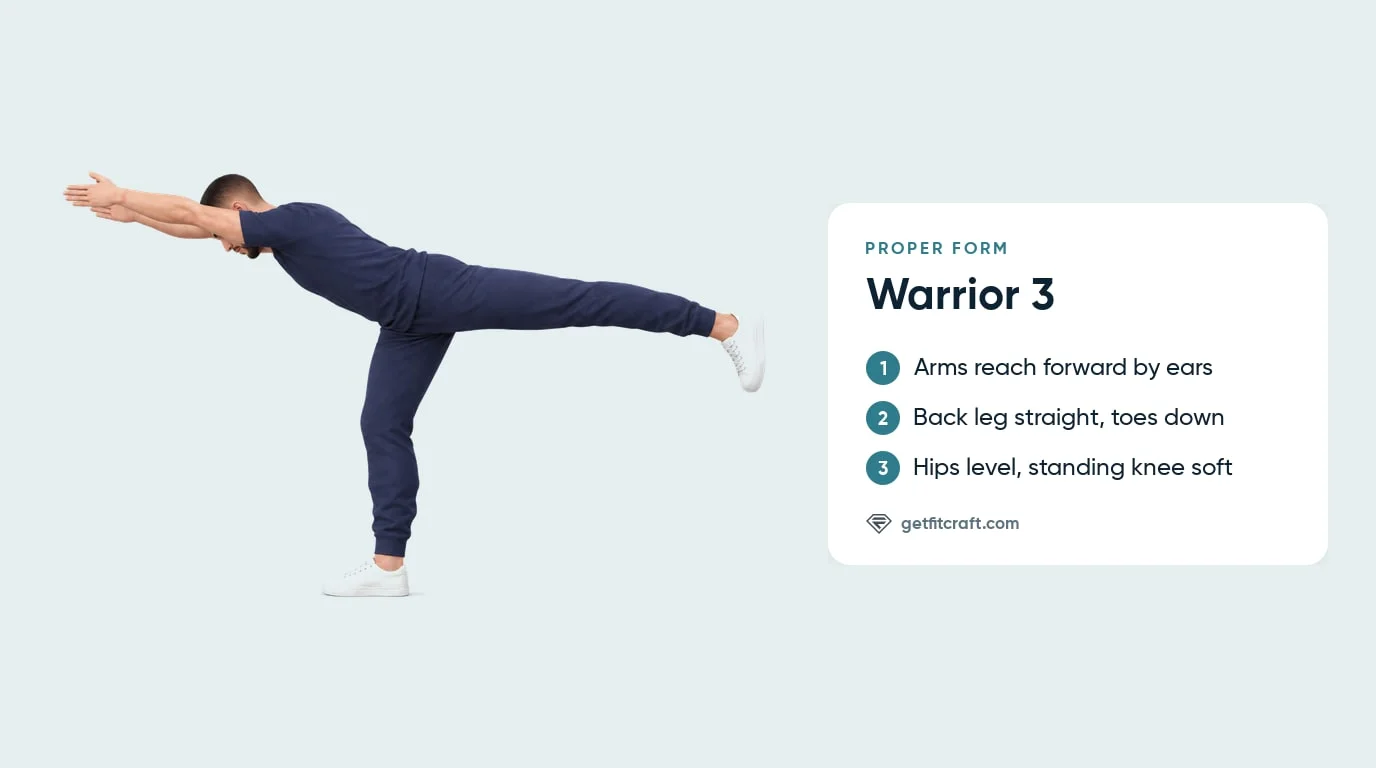
Hinge forward from your standing hip as your other leg lifts straight back. Let the body move like a seesaw: your chest travels forward while your back heel reaches away from you. Keep tipping until your torso and lifted leg come close to level with the floor; a little higher is fine. Keep your back flat and your arms reaching forward beside your ears, palms facing each other.
Tip: push your back heel away as your chest reaches forward, and don't arch your lower back.
Step 3: Square the Pelvis
Keep both hips level and facing the floor. Keep the lifted leg straight, flex the foot, turn the toes down, and keep the lifted glute and hamstrings engaged.
Tip: if your lifted hip rolls open toward the ceiling, point your back toes straight down at the floor and let that hip drop until both hips are level.
Step 4: Find a Steady Gaze
Look at one still point on the floor a little ahead of your standing foot, with your head in line with your back. Keep your whole standing foot pressing into the floor, without gripping the toes or locking the knee.
Tip: keep your neck long instead of craning it to look far ahead. Looking a little further forward is fine if your neck feels good.
Step 5: Hold, Breathe, and Exit Slowly
Hold for several slow breaths, about five to start, building toward ten. Move into and out of the pose slowly. To come out, lower the lifted leg with control, return to standing, reset your breath, and repeat on the other side.
Tip: if you start to fall, put your back foot down and reset.
Get this exercise in a personalized workout
FitCraft, our mobile fitness app, uses its AI coach Ty to program yoga poses like this into your plan at the right volume and intensity, based on your level, goals, and equipment. Ty was designed and trained by Domenic Angelino, MPH (Brown University) and NSCA-CSCS, with research published in the Journal of Strength and Conditioning Research and Medicine & Science in Sports & Exercise.
Take the Free Assessment Free · 2 minutes · No credit cardCommon Mistakes (and How to Fix Them)
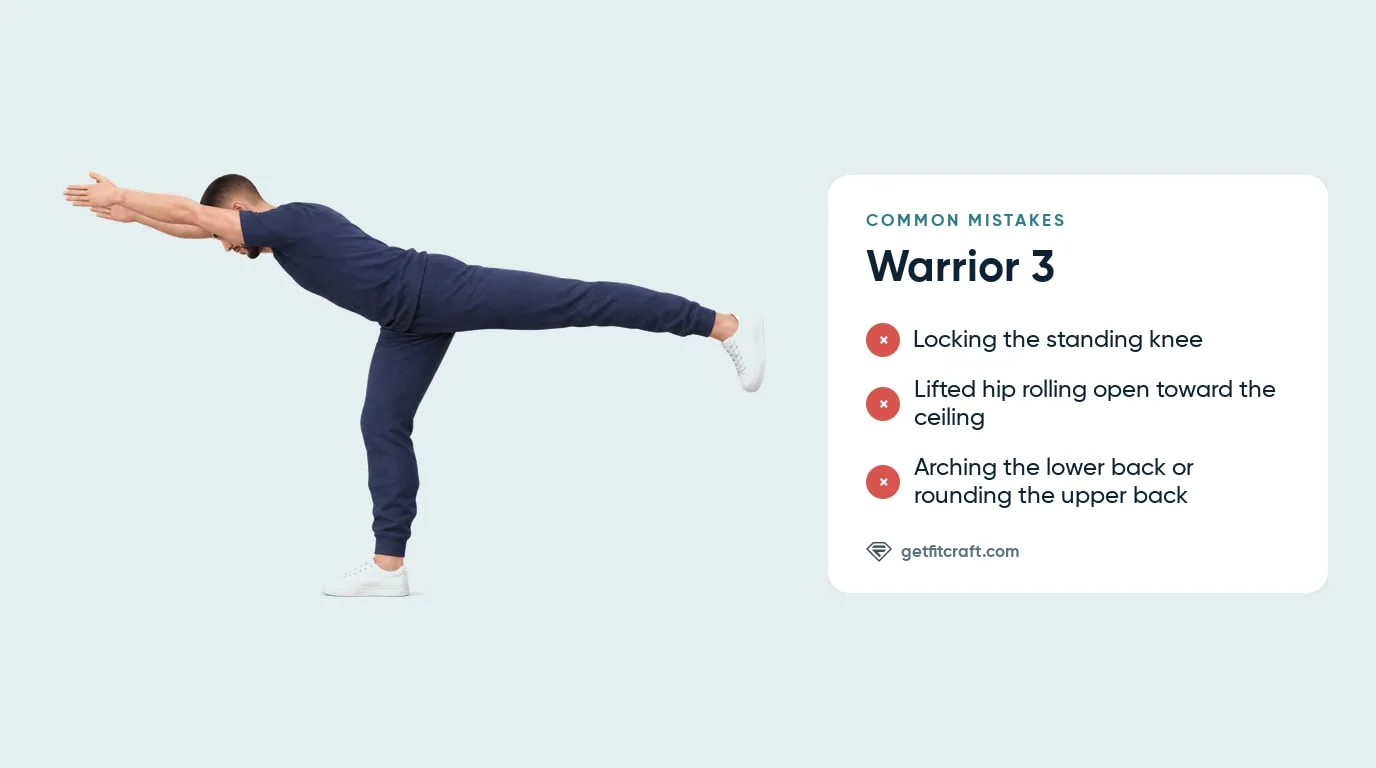
- Locking the standing knee. Keep the knee nearly straight or softly bent, never locked. A soft bend also helps your balance.
- Bending or dropping the lifted leg. A bent or passive back leg sags and turns the pose into a forward lean. Straighten the leg, flex the foot, press the heel back, and engage the lifted glute.
- Opening the hip to the side. The lifted hip often rolls open to make the leg feel higher. Turn the lifted toes toward the floor and think of both hip points facing down.
- Arching the lower back or rounding the upper back. Arching your lower back, or letting your chest and arms droop, takes away the flat back the pose needs. Reach forward through your fingertips, lengthen through the crown of your head, and keep your back flat.
- Craning your neck. Lifting your head to look far forward bends your neck back. Keep your head in line with your back and look at the floor a little ahead of you.
- Holding your breath. Breathe slowly and steadily the whole time, and shorten the hold if your breath gets stuck.
Warrior 3 Variations: Regressions and Progressions
Wall-Supported Warrior 3
Face a wall and place your hands on it as you hinge forward. This lets you practice the hinge with less balance demand.
Chair-Assisted Warrior 3
Hold the back of a sturdy chair while you lift one leg behind you. Once the hinge feels steady, lighten one hand at a time.
Blocks-Under-Hands Warrior 3
Place yoga blocks under your hands and let them support part of your body weight. This is useful when hamstring mobility or balance limits the full arms-forward version.
Hands at Your Chest
Bring your palms together at your chest instead of reaching forward. This is the easier arm position. Arms alongside your body or out to the sides like wings are fine variations too.
Standard Warrior 3
This is the version the FitCraft app teaches, rated Expert. Reach the arms forward beside your ears, keep the hips level, and tip forward until your body and lifted leg come close to level with the floor; a slightly higher chest is fine. Keep the standing knee soft, never locked, the whole time.
Closer to Level, Longer Hold
Once standard Warrior 3 feels steady, tip your body and back leg closer to level with the floor, keeping your back flat and your hips level, and hold for a few more slow breaths.
When to Avoid or Modify Warrior 3 Pose
A burn in your glutes, the backs of your thighs or your shoulders, and a stretch behind your standing leg, are normal in Warrior 3. Any pain in a joint, your lower back or your neck means stop, and so does feeling dizzy or lightheaded. If any of the following applies to you, see a doctor or physical therapist before you do Warrior 3.
- Active vertigo, vestibular symptoms, or high fall risk. Balancing on one leg with your body tipped forward raises the risk of a fall. See a doctor or physical therapist before doing the pose. If they clear you, practice with your hands on a wall or a chair. Stop if you feel dizzy or lightheaded.
- Acute ankle, knee, hip, or lower-back injury. Your standing leg and your lower back hold the whole pose. See a doctor or physical therapist before doing Warrior 3, and ask them when and how to return. Any pain in your ankle, knee, hip or lower back means stop.
- Recent surgery affecting the spine, hips, knees, ankles, or shoulders. Skip the pose until your surgeon or physical therapist clears you, and ask them when and how to return.
- Pregnancy. Your balance changes as your pregnancy progresses. Check with your doctor or midwife before doing Warrior 3, and ask them which version fits each stage of your pregnancy. Any pain in your hips, groin, lower back or pelvis means stop.
- Uncontrolled hypertension or known cardiovascular disease. Ask your doctor which held yoga poses are safe for you and for how long, and never hold your breath.
- Hypermobility or connective tissue disorders. Ask your doctor or physical therapist whether Warrior 3 fits your plan. If they clear you, never lock your standing knee or hang into your standing hip. Any joint pain means stop.
Related Exercises
Use these exercises to build the balance, hip control and mobility that support Warrior 3:
- Other one-leg balances: Tree Pose and Dancer Pose train single-leg balance with different upper-body and hip positions.
- Easier regression: Warrior Pose builds standing-leg endurance with both feet on the floor. The FitCraft app rates it Beginner.
- Mobility prep: Downward Dog and Butterfly Pose prepare your hamstrings, hips and breathing before you balance.
- Flat-back practice: Forearm Planks, Deadbugs, and Bird-Dogs practice keeping your back flat and still before the balance demand rises.
- Strength cousin: Single-Leg Deadlift trains a similar hip-hinge pattern with a strength focus.
How to Program Warrior 3 Pose
Warrior 3 is trained with timed holds, and no study gives hold or rest times for it. The table below gives practical starting ranges for Warrior 3.
| Version | Holds per side | Rest between holds | Frequency |
|---|---|---|---|
| Easier (hands on a wall, a chair or blocks) | 1-2 supported holds of about 5 slow breaths per side | 30-60 seconds or a neutral reset pose | 3-5 sessions/week |
| Expert (the app's Warrior 3) | 2-3 holds of 5 slow breaths per side, building toward 10 | 30-60 seconds | 4-6 sessions/week |
| Harder (closer to level, longer holds) | 3-5 holds of about 10 slow breaths per side | 60-90 seconds or downward dog between sides | 5-7 sessions/week |
Where in your workout: use Warrior 3 inside a standalone yoga session, as a short balance drill after a warm-up, or as part of a cool-down sequence after lower-body training. It pairs well after hip openers and before floor-based recovery poses.
Stop when your form slips: end the hold when the standing knee locks, the lifted hip opens, the back leg sags, or the breath gets stuck. A short, clean hold teaches more than a long, shaky one.
How FitCraft Programs This Exercise
FitCraft can place yoga poses like Warrior 3 inside a broader training plan, so balance work supports strength, mobility, and recovery. Warrior 3 is one of the yoga holds the app can include, rated Expert, with an interactive 3D demonstration of the hold on each side: the back leg straight behind you and the arms reaching forward beside your head. If that's too much right now, start with the easier versions above or with tree pose, which the app rates Intermediate.
Frequently Asked Questions
Can I do Warrior 3 with balance issues or vertigo?
See a doctor or physical therapist first. Warrior 3 is a single-leg balance pose, so if you have active vertigo, vestibular symptoms or a high risk of falling, ask them before you do it. If they clear you, practice with your hands on a wall or a chair, and stop if you feel dizzy or lightheaded.
What muscles does Warrior 3 work?
Warrior 3 works the glutes, hamstrings, erector spinae and anterior deltoids, with help from the rhomboids. The glutes and hamstrings hold your hinged standing hip and keep your back leg lifted, the erector spinae along your spine keep your back flat, the anterior deltoids at the front of your shoulders hold your arms forward, and the rhomboids between your shoulder blades draw your shoulder blades back as your chest lifts. A stretch behind your standing leg is normal.
Why is Warrior 3 so hard to balance in?
In Warrior 3 your body tips forward over one foot, so small shifts move you off balance. A fixed gaze, a soft standing knee, an active lifted leg and even pressure through your whole standing foot make it easier to stay steady.
Should my standing leg be bent or straight in Warrior 3?
Never lock it. Anywhere from nearly straight to a soft bend is fine, and a soft bend helps your balance. If the back of your standing leg feels too tight, bend that knee a little more.
How long should I hold Warrior 3?
Start with about 5 slow breaths per side and build toward 10 as the pose gets steadier. In a FitCraft workout, the workout sets the time. Clean alignment matters more than total time.