Scissor raises look simple because the setup is simple: lie on your back, lift your legs, and alternate them up and down. The hard part is keeping your pelvis still while long, moving legs try to pull your lower back away from the floor.
That is why this exercise belongs in the core category as much as the hip-flexor category. Your hip flexors move the legs, but your abs control the pelvis. When your abs cannot hold your pelvis still, your lower back arches off the floor, which is the main mistake to avoid.
Use scissor raises after you are comfortable with easier core work on your back, like partial deadbugs (rated Intermediate in the FitCraft app) and heel taps (rated Beginner). Then build range and tempo slowly.
Quick Facts: Scissor Raises
- Equipment needed: None, though an exercise mat helps
- Difficulty: Advanced (as rated in the FitCraft app); easier with your legs higher or knees slightly bent
- Modality: Core strength
- Body region: Core and hip flexors (rectus abdominis and hip flexors, with the obliques and transverse abdominis helping)
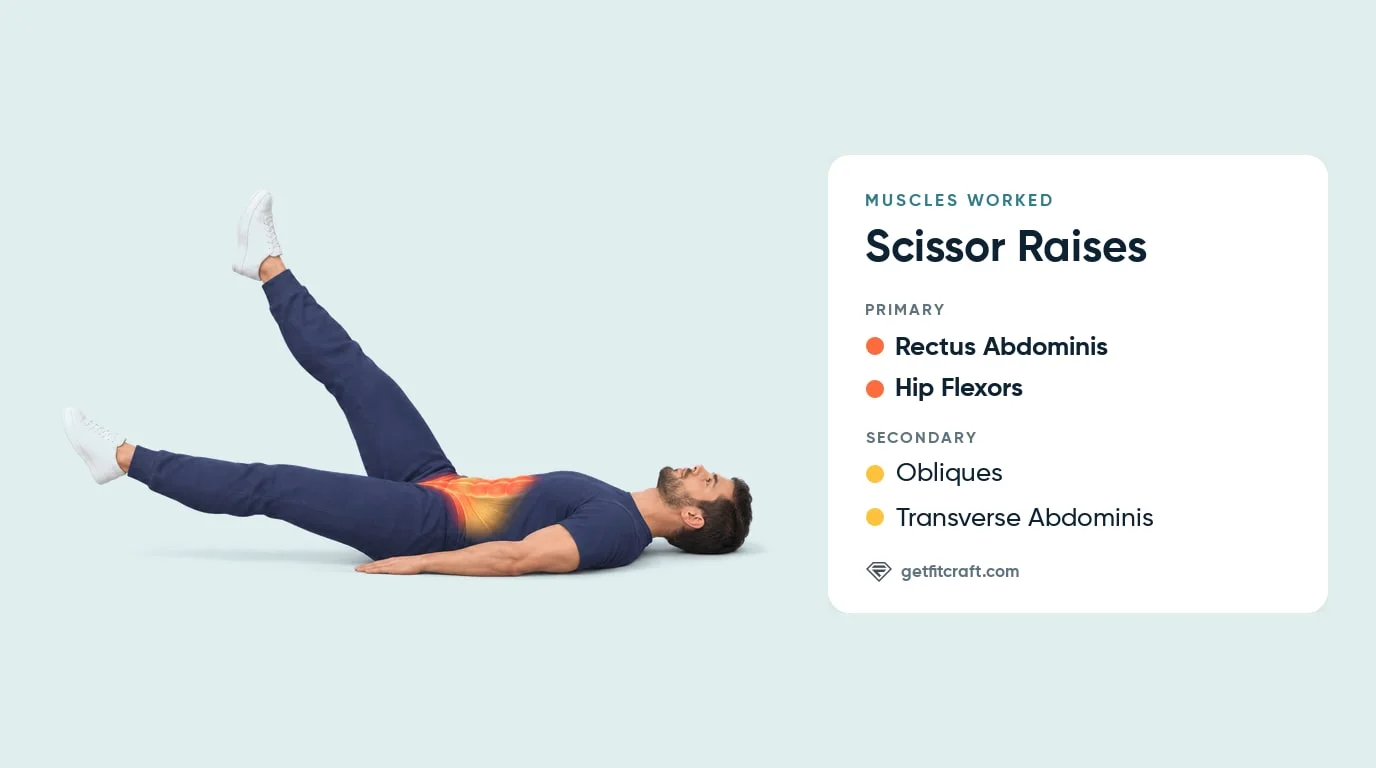
Muscles Worked
Primary movers: the rectus abdominis and hip flexors. The hip flexors at the front of your hips lift and lower your legs through the scissor pattern, while the rectus abdominis, the long muscle down the front of your stomach, works hard to keep your pelvis tucked and your lower back pressed into the mat.
Secondary movers: the obliques and transverse abdominis. The obliques along the sides of your waist help keep your hips from rocking side to side as your legs switch, and the transverse abdominis, the deep layer that wraps around your middle, keeps your trunk braced while your legs move. Steady breathing helps you hold that brace.
Why the exercise feels so demanding: straight legs create a long lever. The lower the bottom leg gets, the harder your abs have to work to keep your lower back pressed down. If your back cannot stay down, the range is too low for your current strength, so raise both legs higher.
How to Do Scissor Raises (Step-by-Step)
- Set your back position. Lie on your back on a mat with your arms along your sides, palms down, or your hands tucked under your hips. Rest your head on the floor with your neck relaxed and your eyes on the ceiling, then gently press your lower back into the floor and keep it there from the first rep to the last.
- Lift both legs. Lift both legs a few inches off the floor, long and nearly straight; a slight bend at the knees is fine. If your lower back lifts, raise your legs higher until it stays pressed down: the lower your legs go, the harder the exercise is.
- Start the scissor pattern. Raise one leg toward the ceiling, anywhere from about 45 degrees to nearly straight up, while the other leg hovers a few inches to about a foot off the floor. Keep both legs long and lower the bottom leg only as far as your lower back stays pressed down.
- Alternate with control. Switch legs in a smooth scissor motion. Take about a second and a half for each switch, then pause briefly. No fast kicking. Breathe steadily and evenly the whole set, keep your hips still so your pelvis does not rock, and keep your heels off the floor until the set is finished.
- End the set before form breaks. End the set when your lower back starts to arch or your legs speed up, then lower both legs with control instead of dropping your heels to the floor.
Get this exercise in a personalized workout
FitCraft, our mobile fitness app, uses its AI coach Ty to program core stability work like this into your plan at the right volume and intensity, based on your level, goals, and equipment. Ty was designed and trained by Domenic Angelino, MPH (Brown University) and NSCA-CSCS, with research published in the Journal of Strength and Conditioning Research and Medicine & Science in Sports & Exercise.
Take the Free Assessment Free · 2 minutes · No credit card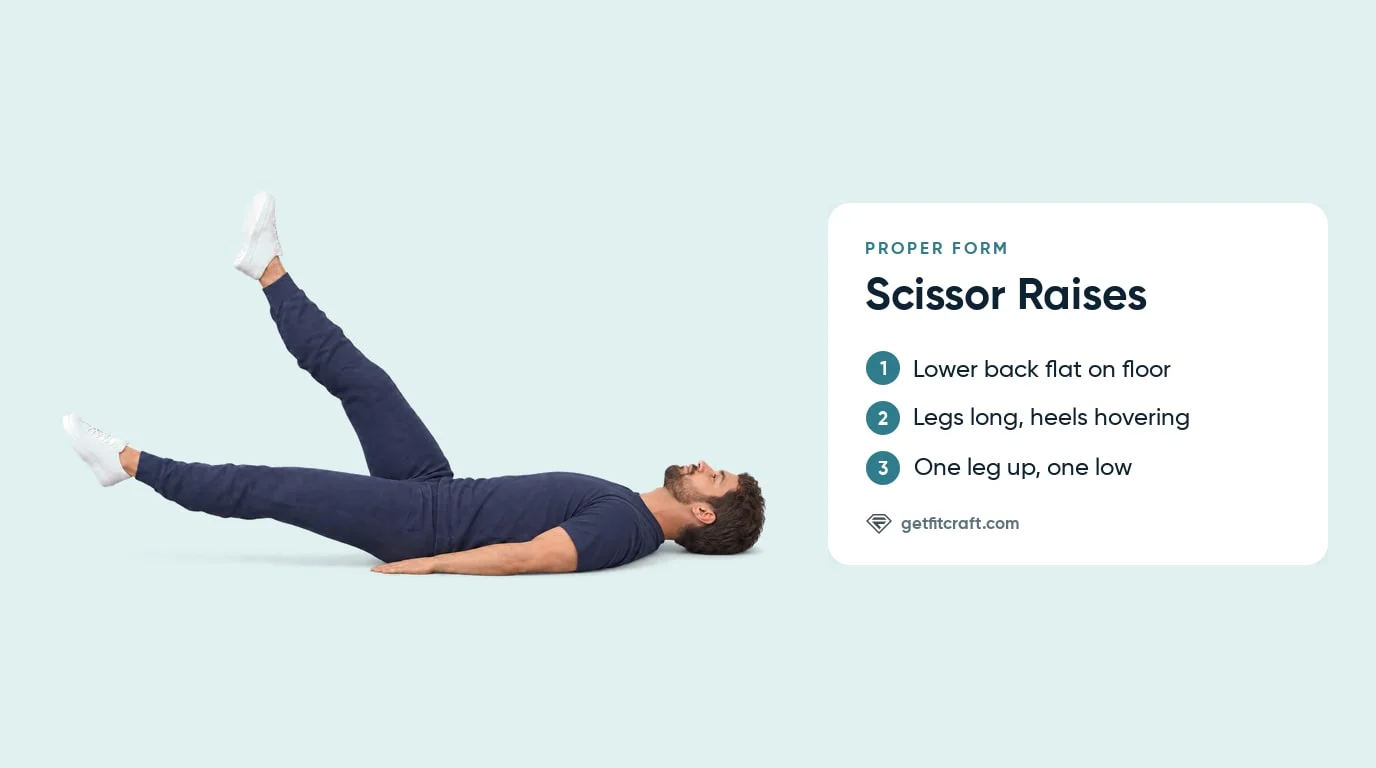
Common Mistakes to Avoid
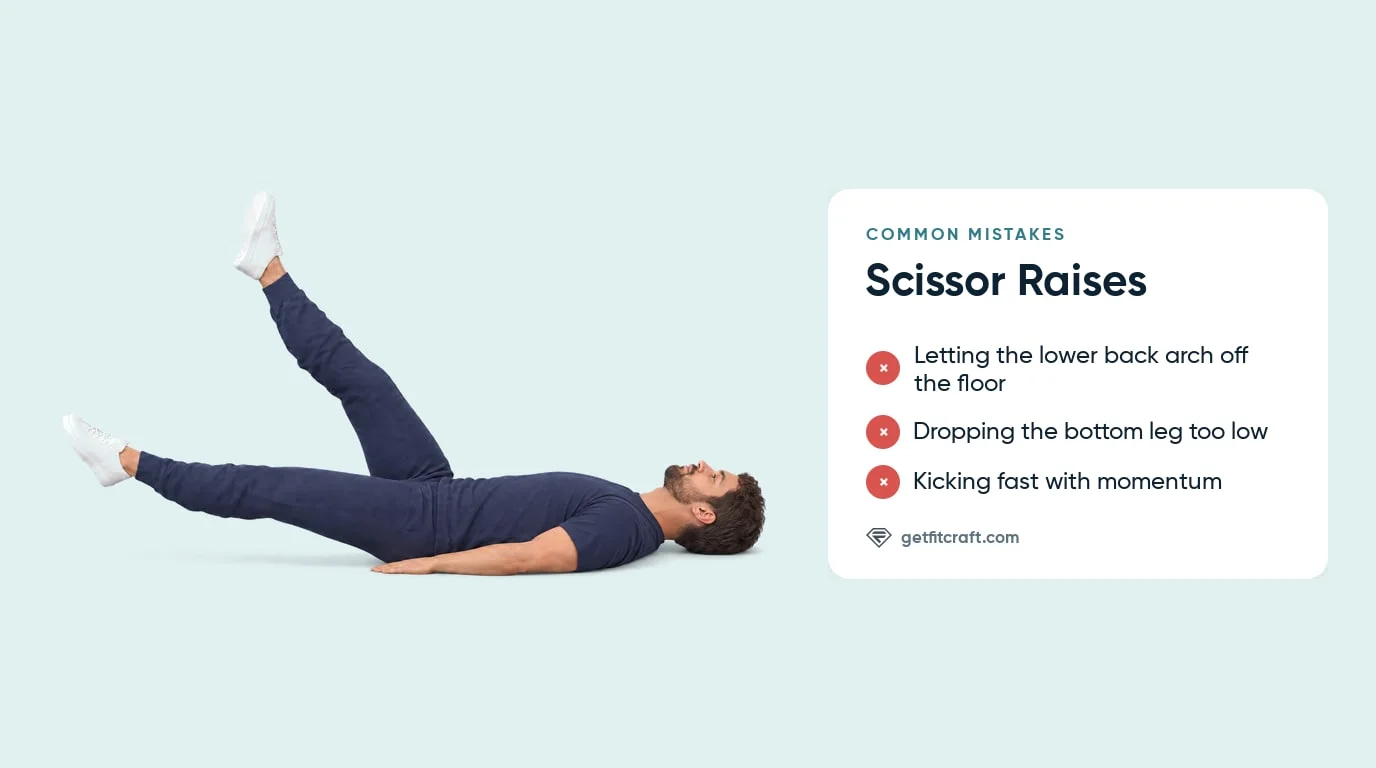
- Arching the lower back. This is the main form error. It means the leg angle is too low, the set has gone too long, or your core is not ready for straight legs yet. Fix it by raising the legs, bending the knees a little, or switching to partial deadbugs.
- Moving too fast. Speed turns the exercise into momentum. Slow the switch between legs, about a second and a half each, so your abs have to control the pelvis through the whole rep.
- Dropping the bottom leg too low or bouncing the heels. Keep the bottom leg hovering a few inches to about a foot off the floor, never so low that your lower back arches. For the full version both heels stay off the floor; touching down lightly between reps is a fine easier option, but never bounce into the next rep.
- Rocking the hips side to side. Your hips stay still on the floor as your legs switch. If they rock, slow down and make the scissor smaller.
- Holding your breath. Breathe steadily and evenly the whole set; don't hold your breath.
- Straining the neck or lifting the shoulders. Keep your head resting on the floor and your shoulders relaxed. If your neck feels fine, you can lift your head slightly with your chin tucked, but rest it again as soon as your neck tenses.
Scissor Raise Variations: Regressions and Progressions
Easier Scissor Raises
Keep both legs higher, bend your knees a little, or tuck your hands under your hips, and use the same alternating pattern. You can also let your heels touch down lightly between reps, without bouncing. Each of these makes it easier to keep the lower back flat. A partial deadbug, with your knees bent over your hips and one leg reaching out at a time, is a gentler start.
Standard Scissor Raises
This is the version the FitCraft app teaches and rates Advanced: lying flat with your arms along your sides, legs long and nearly straight, one leg rising to about 45 degrees or higher while the other hovers low, with a slow, even switch. Resting your head is the default; lifting it slightly with your chin tucked is an option only while your neck stays comfortable. Master clean sets before you make the range lower or the tempo slower. A seated scissor, leaning back on your hands, is a different version and not the one this guide teaches.
Harder Scissor Raises
Lower the bottom leg closer to the floor while your lower back stays pressed down, slow the switch, or pause for a second with the low leg hovering at each switch.
When to Avoid or Modify Scissor Raises
Scissor raises need no equipment, but if any of the situations below applies to you, check with a doctor or physical therapist before you do them. A burn in your stomach or the front of your hips is normal; any pain in a joint, your lower back or your neck means stop the exercise.
- Acute lower-back pain or known disc pathology. Scissor raises can pull your lower back into an arch if your abs cannot hold your pelvis down. See a doctor or physical therapist before you do them, and do them only once they clear you. During a set, any pain in your lower back means stop the exercise.
- After giving birth, or with diastasis recti. Check with your doctor, midwife or a women's health physical therapist first, and do scissor raises only with their go-ahead. Stop if you see coning or doming along the middle of your belly, or if you feel any pain.
- Recent abdominal surgery. Wait until your surgeon clears you before you do scissor raises, and stop if you feel any pain.
- Hernia symptoms or pelvic-floor dysfunction. See a doctor or a pelvic-floor physical therapist before you do scissor raises, and do them only with their go-ahead. Stop if you feel pressure, a bulge, heaviness or leakage, or any pain.
- Pregnancy. Check with your doctor or midwife before you do scissor raises or any exercise lying on your back, and do them only with their go-ahead. Stop if you feel dizzy, lightheaded or any pain.
- Hip-flexor pinching or front-of-hip pain. Pinching at the front of the hip is pain in a joint, so stop the exercise. See a doctor or physical therapist before you do scissor raises again, and do them only once they clear you.
Related Exercises
- Same muscles: Leg Raises work the rectus abdominis and hip flexors with both legs moving together; the FitCraft app rates them Intermediate.
- Easier core work on your back: Heel Taps, rated Beginner in the app, keep your feet on the floor and work the obliques and rectus abdominis; Partial Deadbugs, rated Intermediate, train your abs to keep your lower back flat while one leg reaches out.
- Steady trunk while a leg moves: Deadbugs train your abs to hold your lower back flat as each leg lowers, and Bird-Dogs train a flat back and level hips while a leg moves.
- Held option: Hollow Holds ask your abs to keep your lower back pressed down while your legs stay still off the floor, without switching legs.
- Glute balance: Glute Bridges work the glutes at the back of your hips, a good balance for core work that leans on the hip flexors.
How to Program Scissor Raises
The American College of Sports Medicine position stand on resistance training says your training has to progress for you to keep improving. It also says the right amount depends on your goals, your physical capacity and how trained you are (Ratamess et al., 2009). It gives no set and rep ranges for scissor raises, so the table below is a practical starting point, not figures from the position stand.
| Level | Sets × Reps | Rest between sets | Frequency |
|---|---|---|---|
| Easier (legs higher or knees slightly bent) | 2-3 × 8-12 per side | 45-60 seconds | 2-3 sessions/week |
| Advanced (the standard scissor raise, as rated in the FitCraft app) | 3 × 10-20 per side | 45-60 seconds | 2-4 sessions/week |
| Harder (bottom leg lower, slower switch or a pause) | 3-4 × 15-30 slow reps per side | 60 seconds | 3-4 sessions/week |
Where in your workout: place scissor raises near the end of a resistance-training session, as a core finisher, or in a standalone core circuit. If you use them as activation, keep the reps low so your hip flexors and abs are not fatigued before heavier work.
Good form comes before the rep target: end the set when your lower back lifts or your legs start swinging. A shorter set with your back flat is better than a longer one with your back arched.
How FitCraft Programs This Exercise
FitCraft maps your level, goals and equipment during the free assessment and builds a plan around them. The app has one scissor raise exercise, rated Advanced, and can include it in your plan. Its 3D demonstration shows the position lying flat with the arms along the sides and the legs long, one leg rising while the other hovers low. Start with the easier versions above if your lower back will not stay down.
Frequently Asked Questions
What muscles do scissor raises work?
Scissor raises mainly work the rectus abdominis, the long muscle down the front of your stomach, and the hip flexors at the front of your hips: the hip flexors lift and lower your legs while the rectus abdominis keeps your lower back pressed down. The obliques along the sides of your waist and the transverse abdominis, the deep layer that wraps around your middle, help keep your hips still and your trunk braced.
Can I do scissor raises with lower-back pain?
If you have lower-back pain or a known disc problem, see a doctor or physical therapist before you do scissor raises, and do them only once they clear you. A burn in your stomach or the front of your hips is normal, but any pain in your lower back means stop the exercise.
How many scissor raises should I do?
Start with 2 to 3 sets of 8 to 12 controlled reps per side, using an easier version if you need it. With the standard version, which the FitCraft app rates Advanced, build toward 3 sets of 10 to 20 reps per side. Harder versions can use 3 to 4 sets of 15 to 30 slow reps per side, but only while the lower back stays pressed down.
Are scissor raises better than crunches for lower abs?
Lower abs are not a separate muscle: the rectus abdominis runs from your ribs to your pelvis and works as one muscle. Crunches curl your upper body forward, while scissor raises ask your abs to keep your lower back pressed down while your hip flexors move your legs. Use scissor raises when you want that control plus hip flexor work.
Can I do scissor raises every day?
Do scissor raises 2 to 4 times per week, not every day, with rest days in between. Whatever your schedule, your lower back should never hurt: any pain in your lower back means stop the exercise.