Holding your legs straight up over such a small base takes steady work from your core. A common problem is the elbows sliding wide: if your upper arms aren't pressing down, your body sinks and your neck ends up carrying weight it shouldn't.
The goal is a steady hold with your legs straight up. Your shoulders and upper arms carry your weight, your hands support your back, and your neck stays still and free of weight.
Quick Facts: Shoulder Stand Pose
- Equipment needed: None beyond a mat; a firm folded blanket under the shoulders is optional
- Difficulty: Expert (as rated in the FitCraft app)
- Modality: Yoga inversion, a static hold that works the core
- Body region: Core (abs, obliques and deep core)
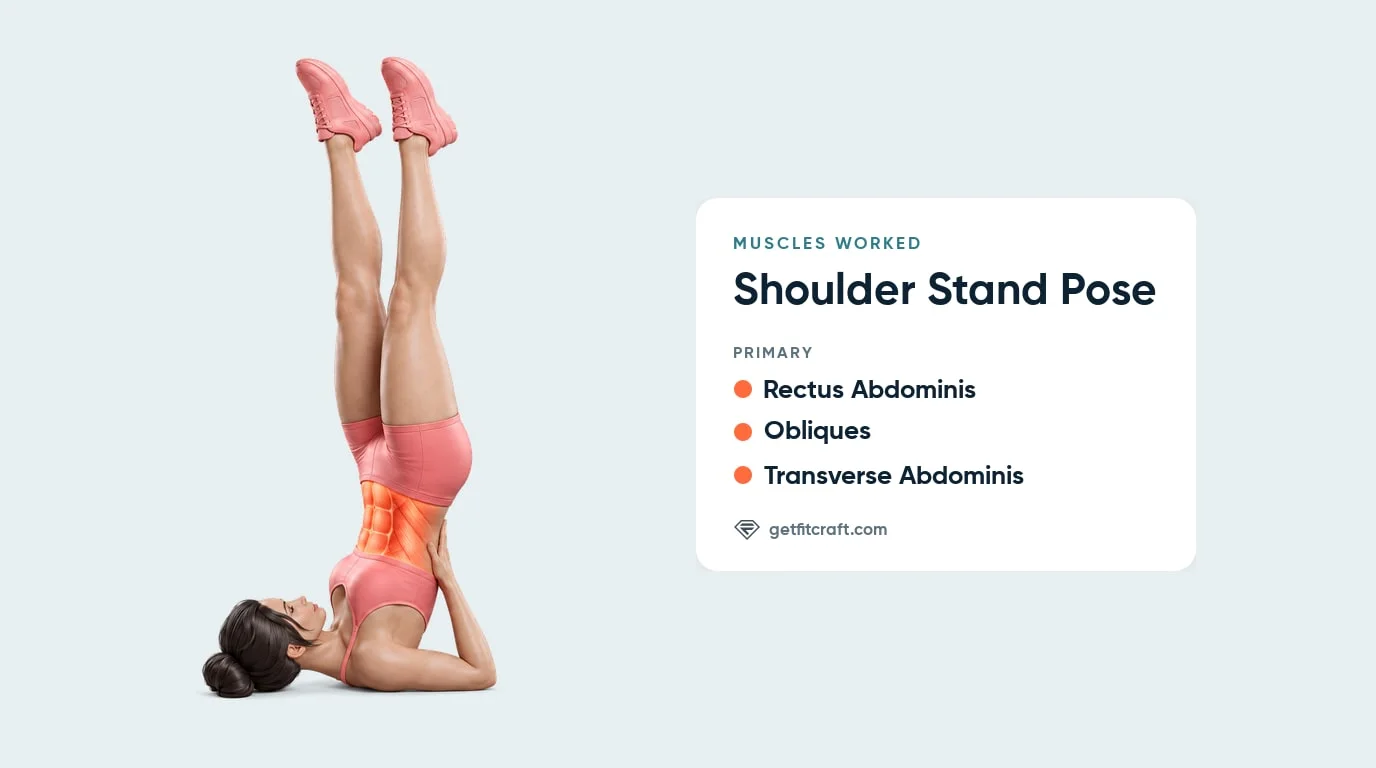
Muscles Worked
Muscles worked: the rectus abdominis, the obliques and the transverse abdominis, all three as main movers. Shoulder stand is a static hold, so they work without your body moving. Your abs (the rectus abdominis, down the front of your stomach), your obliques (along the sides of your waist) and your deep core (the transverse abdominis, a band of muscle that wraps around your lower abdomen) work together to hold your legs straight up over a small base and keep your body from tipping.
A strength hold, not a stretch: shoulder stand is a yoga pose, but it is closer to resistance training than to stretching. You should feel it in your abs, along the sides of your waist and in your deep core, never in your neck. Any neck pain means come down right away.
Where your weight goes: on the tops of your shoulders and the backs of your upper arms, with your elbows on the floor about shoulder-width apart and your palms holding your back. The back of your head rests on the floor, but your neck carries no weight. If your elbows slide wide, your body sinks toward your neck, which is why the elbow position matters so much.
Step-by-Step: How to Do Shoulder Stand Pose
Step 1: Lie on Your Back
Lie on your back on a mat with your arms along your sides, palms down. The FitCraft app teaches the pose with no props. If you want more room for your neck, place a firm folded blanket under your shoulders with the back of your head on the floor beyond its edge. The blanket is optional, never required.
Step 2: Roll Your Hips Up
Bend your knees, press your arms into the floor, and breathe out as you roll your hips and back up until your knees come toward your face. Move slowly enough that you can stop at any point, and never kick your legs up.
Step 3: Support Your Back
Bend your elbows and place your palms on your back with your fingers pointing up. Keep your elbows on the floor about shoulder-width apart so your upper arms share the weight evenly. If your elbows slide wide, your body sinks toward your neck.
Step 4: Straighten Your Legs Up
Lift your hips over or close to your shoulders and straighten your legs toward the ceiling, keeping them together. Your abs, obliques and deep core hold them straight up and steady. Your body doesn't have to be perfectly vertical, and steady matters more. Keep the back of your head on the floor, your chin moving toward your chest and your eyes on your chest. Never turn your head while you are up.
Step 5: Hold and Roll Down
Breathe slowly and steadily while you hold, and never hold your breath upside down. Hold for the time your workout sets. If you are new to the pose, about 30 seconds is plenty, and coming down early is always fine. To come down, bend your knees toward your forehead, keep your hands on your back, and roll your back down slowly, one part at a time, with your head on the floor. Rest on your back for a few breaths before you sit up.
Get this exercise in a personalized workout
FitCraft, our mobile fitness app, uses its AI coach Ty to program yoga poses like this into your plan at the right volume and intensity, based on your level, goals, and equipment. Ty was designed and trained by Domenic Angelino, MPH (Brown University) and NSCA-CSCS, with research published in the Journal of Strength and Conditioning Research and Medicine & Science in Sports & Exercise.
Take the Free Assessment Free • 2 minutes • No credit card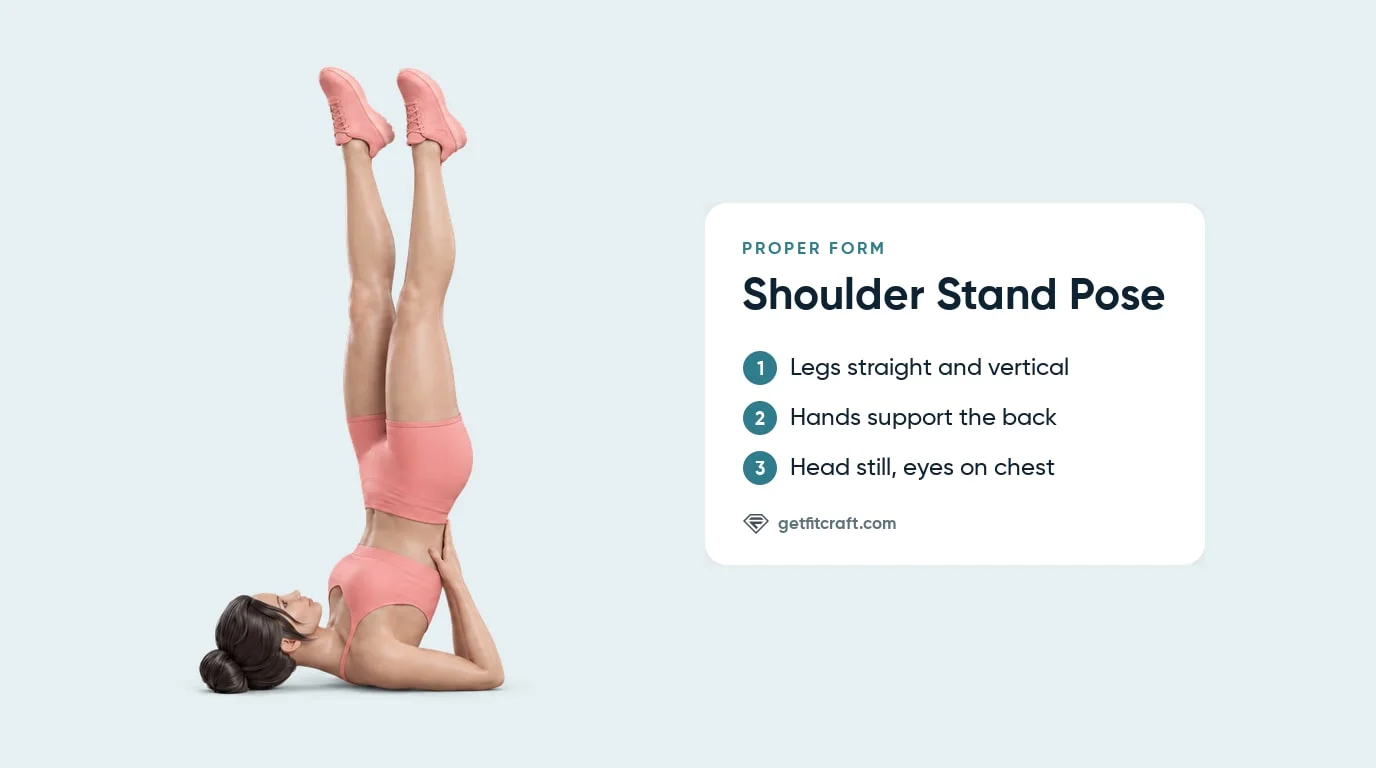
Common Mistakes (and How to Fix Them)
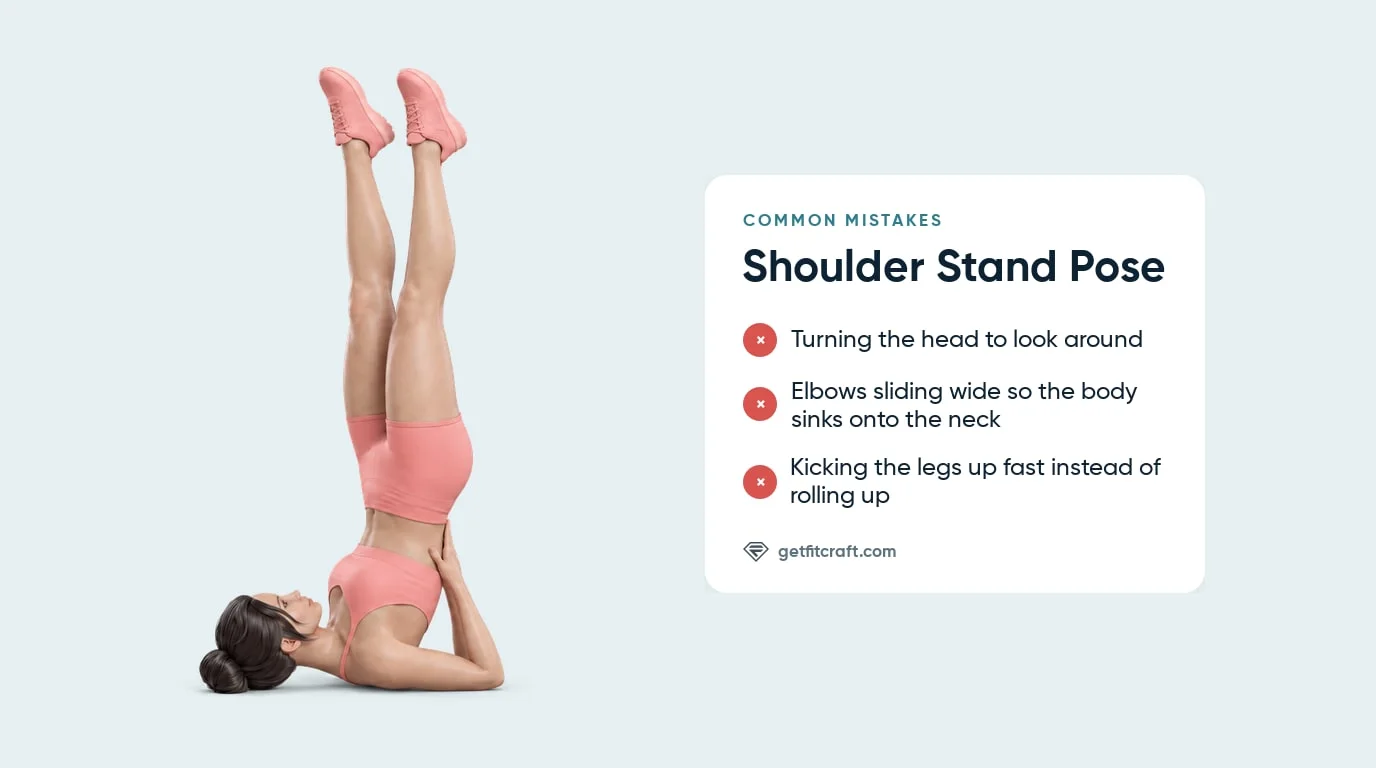
- Turning the head. Turning your head while you are up twists your neck while your body is above it. Keep your head still and your eyes on your chest. Come down before you look around.
- Letting the elbows slide wide. Wide elbows make the back support collapse, and your body sinks onto your neck. Keep your elbows on the floor about shoulder-width apart, with your palms spread on your back.
- Kicking the legs up. Throwing your legs up fast makes it hard to control where your weight lands. Bend your knees, press your arms down and roll your hips up slowly.
- Holding your breath. Holding your breath upside down makes the hold tense and harder to control. Breathe out as you roll up, then keep breathing slowly and steadily. If you can't, come down and rest.
- Dropping down fast. Coming down quickly is when control is easiest to lose. Bend your knees toward your forehead, keep your hands on your back and roll down slowly, one part of your back at a time, with your head on the floor.
Shoulder Stand Pose Variations: Easier and Harder Versions
Hips on a Cushion, Legs Up (Easier)
Lie on your back with a firm cushion or block under your hips and lift your legs straight up, arms resting on the floor. Your neck carries nothing, so this is the place to start if the full pose is too much.
Core Work Without Going Upside Down
The FitCraft app also has lying leg raises, where you lift your straight legs up and lower them slowly on your back, and boat pose, where you sit, lean back a little and lift your legs, balancing on your seat. Both work your core with no weight on your neck. Leg raises, rated Intermediate in the app, are an easier way to work your core. Boat pose is rated Expert, the same as the shoulder stand, so it is another option rather than an easier one.
Supported Shoulder Stand (Standard, Expert in the App)
This is the version covered in the steps above: on a mat, hands on your back, elbows on the floor about shoulder-width apart, legs straight up and together. The FitCraft app has one shoulder stand exercise and rates it Expert. A firm folded blanket under your shoulders is optional.
Longer Holds and Hands Higher (Harder)
Hold a few breaths longer, keeping your legs straight, your head still and your weight on your shoulders. You can also walk your hands a little higher up your back so your hips stack more over your shoulders, only while your neck stays comfortable. The plow, where the feet lower behind the head, and the shoulder stand with the arms released from the back are not taught in this guide.
When to Avoid or Modify Shoulder Stand Pose
A burn in your abs, the sides of your waist or your deep core is normal in shoulder stand. Any pain in your neck, back, shoulders or another joint means come down right away, and so does a headache, dizziness, or pressure in your head or eyes. If any of the following applies to you, skip the shoulder stand unless your doctor says it's okay.
- High blood pressure. Skip the shoulder stand unless your doctor says it's okay. A headache, dizziness or pressure in your head while you are up means come down slowly, then stop and rest.
- Glaucoma, recent eye surgery or another eye condition. Skip the shoulder stand unless your eye doctor says it's okay. Any pressure in your eyes while you are up means come down slowly, then stop and rest.
- Neck injury, recent neck surgery or neck pain. Skip the shoulder stand unless your doctor or physical therapist says it's okay, and ask them which exercises suit you. Any neck pain while you are up means come down right away.
- Pregnancy. Skip the shoulder stand unless your doctor or midwife says it's okay.
Related Exercises
These exercises pair well with shoulder stand or work your core without going upside down:
- Yoga warm-up: Downward Dog and Cat-Cow are gentle yoga moves to do earlier in a session, before shoulder stand.
- Shoulder mobility: Shoulder Rolls, Rotator Cuff Stretch, and Seated Rear Delt Stretch are gentle shoulder moves for the same session.
- Core without going upside down: Forearm Planks, Hand Planks, Hollow Holds, Leg Raises and Boat Pose work your core with no weight on your neck.
- Back-body hold: Superman Holds are a face-down hold for the muscles along your back and your glutes, the opposite side of the body from the core muscles shoulder stand works.
- Yoga poses without going upside down: Cobra Pose and Chair Pose put no weight on your neck.
How to Program Shoulder Stand Pose
Shoulder stand is programmed by hold time, not by reps or added load. Form and calm breathing come first: hold for the time your workout sets, and come down early whenever your weight drifts toward your neck. The table below is a practical starting point.
| Version | Hold | Key point |
|---|---|---|
| Easier (hips on a firm cushion, legs straight up) | Hold while you breathe steadily; coming down early is always fine | Your neck carries nothing |
| Expert (the supported shoulder stand, as rated in the app) | About 30 seconds when you are new to it; coming down early is always fine | Weight on the shoulders and upper arms, never the neck |
| Harder (longer holds or hands higher up the back) | A few breaths longer than your last steady hold | Only while your neck stays comfortable |
Where in your workout: do shoulder stand once you are warmed up, for example later in a yoga session, not as the first thing you do. Rest on your back for a few breaths after you roll down.
Form over hold time: come down when your elbows slide wide, your breath tightens, or your legs wobble so much that you can't roll down smoothly. Any neck pain means come down right away. A short, steady hold beats a longer one with weight on your neck.
How FitCraft Programs This Exercise
FitCraft maps your level, goals, and equipment during the diagnostic and builds a plan around them. The app has one shoulder stand exercise, rated Expert, and its 3D demonstration shows the supported version on a plain mat: hands on the back, elbows on the floor and legs straight up.
Frequently Asked Questions
What does shoulder stand pose work?
Shoulder stand pose works three core muscles: the rectus abdominis, the obliques and the transverse abdominis. Your abs, the obliques along the sides of your waist and your deep core work to hold your legs straight up over a small base and keep your body from tipping. It is a strength hold, not a stretch, and you shouldn't feel it in your neck.
Can I do shoulder stand pose with neck pain?
Skip the shoulder stand if you have neck pain or a neck injury unless your doctor says it's okay, and see a doctor or physical therapist about the pain. Any neck pain while you are up means come down right away.
How long should I hold shoulder stand?
Hold for the time your workout sets, breathing slowly and steadily. If you are new to the pose, a short hold of around 30 seconds is plenty, and coming down early is always fine. Hold longer only while your weight stays on your shoulders and upper arms and your neck stays comfortable.
Why does my neck hurt in shoulder stand?
Neck pain in shoulder stand usually means weight has moved onto your neck, often because your elbows slid apart and your body sank. Any neck pain means come down right away and stop. See a doctor or physical therapist about the pain before you try the pose again.
What is an easier version of shoulder stand pose?
Lie on your back with a firm cushion or block under your hips and lift your legs straight up, arms resting on the floor, so your neck carries nothing. Lying leg raises, rated Intermediate in the app, also work your core without going upside down.