Standing twists look simple: lift one knee, bend toward it, stand back up and switch sides. The work is at the sides of your waist, as the obliques bend your upper body toward the rising knee and add a small turn. One foot always stays on the floor, so there is no jumping.
That makes standing twists useful for people who want core work without getting on the floor. A lower knee lift at a slower pace makes them easier to control, and a brisker pace raises your heart rate in a cardio circuit. Pick up speed only while every rep still brings your elbow and knee toward each other.
Quick Facts: Standing Twists
- Equipment needed: None
- Difficulty: Intermediate (as rated in the FitCraft app); a lower knee lift at a slower pace makes it easier
- Modality: Cardio / core
- Body region: Core (the sides and front of the waist)
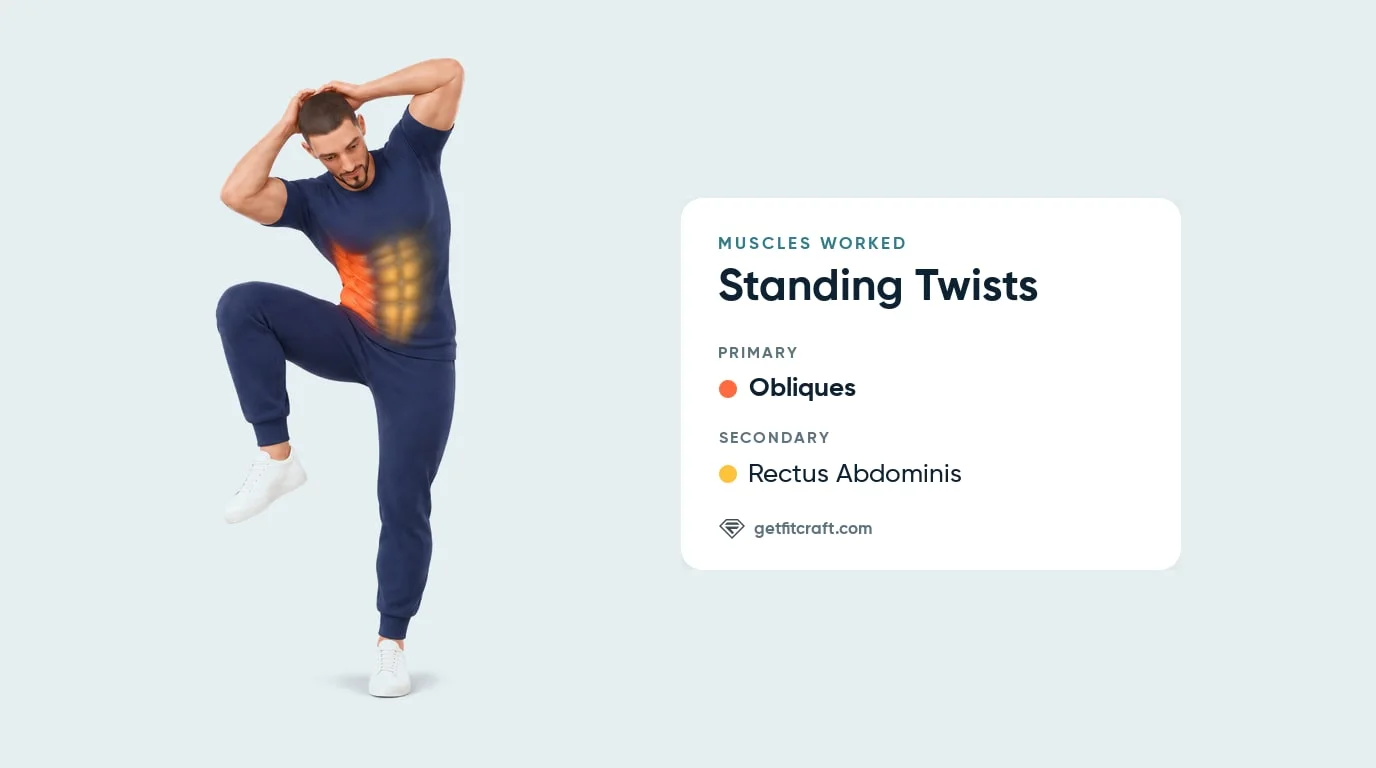
Muscles Worked
Primary muscle: the obliques, the muscles on the sides of your waist. As your knee rises, they bend your upper body sideways toward it and add a small turn, so the elbow on that side comes down toward the knee. You feel them most on the side you bend toward.
Secondary muscle: the rectus abdominis, the long muscle down the front of your belly. It adds the slight forward curl as you crunch toward the knee.
Step-by-Step: How to Perform Standing Twists
Step 1: Set Your Stance
Stand tall with your feet about hip-width to shoulder-width apart, or a little wider, and your knees soft. Rest your hands lightly behind your head with your elbows bent and pointing out to the sides. No equipment is needed.
Tip: keep your hands light behind your head and never pull on your head or neck.
Step 2: Lift One Knee Up and Out
Shift your weight onto one leg and lift the other knee up and out to the side to about hip height, with your thigh about level with the floor. A lower lift is fine. Keep the standing knee soft and that foot flat on the floor.
Tip: lift the knee only as high as you can control on a steady standing leg, and never lean back to get it higher.
Step 3: Crunch Toward the Knee
As the knee rises, bend your upper body toward it and bring the elbow on that same side down toward the knee, with a slight forward curl and a small turn. Squeeze the side of your waist. Your elbow and knee move toward each other but do not need to touch.
Tip: bend toward the knee only as far as is comfortable. Never force it.
Step 4: Stand Back Up Tall
Lower the foot to the floor and stand back up tall. Your hips can turn and tilt a little as the knee comes up, so there is no need to hold them square. Just come all the way back up to standing tall between sides.
Tip: keep one foot on the floor at all times, with no hop.
Step 5: Switch Sides and Keep Alternating
Repeat on the other side and keep alternating at a steady rhythm, about a second and a half per side, with the standing knee soft and never locked. Breathe out as you crunch and breathe in as you stand tall.
Tip: never hold your breath. If you lose your balance, slow down or rest one hand on a wall.
Get this exercise in a personalized workout
FitCraft, our mobile fitness app, uses its AI coach Ty to program core stability work like this into your plan at the right volume and intensity, based on your level, goals, and equipment. Ty was designed and trained by Domenic Angelino, MPH (Brown University) and NSCA-CSCS, with research published in the Journal of Strength and Conditioning Research and Medicine & Science in Sports & Exercise.
Take the Free Assessment Free · 2 minutes · No credit card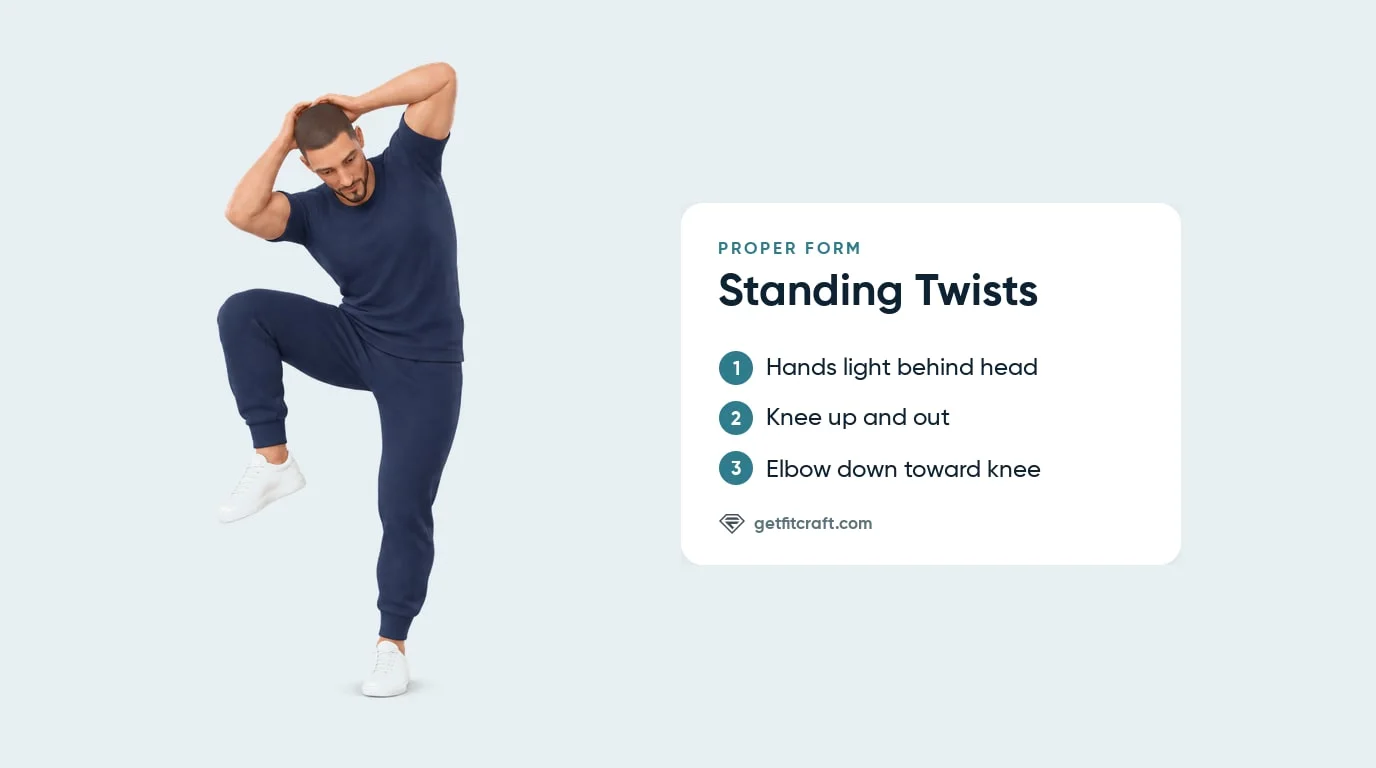
Common Mistakes (and How to Fix Them)
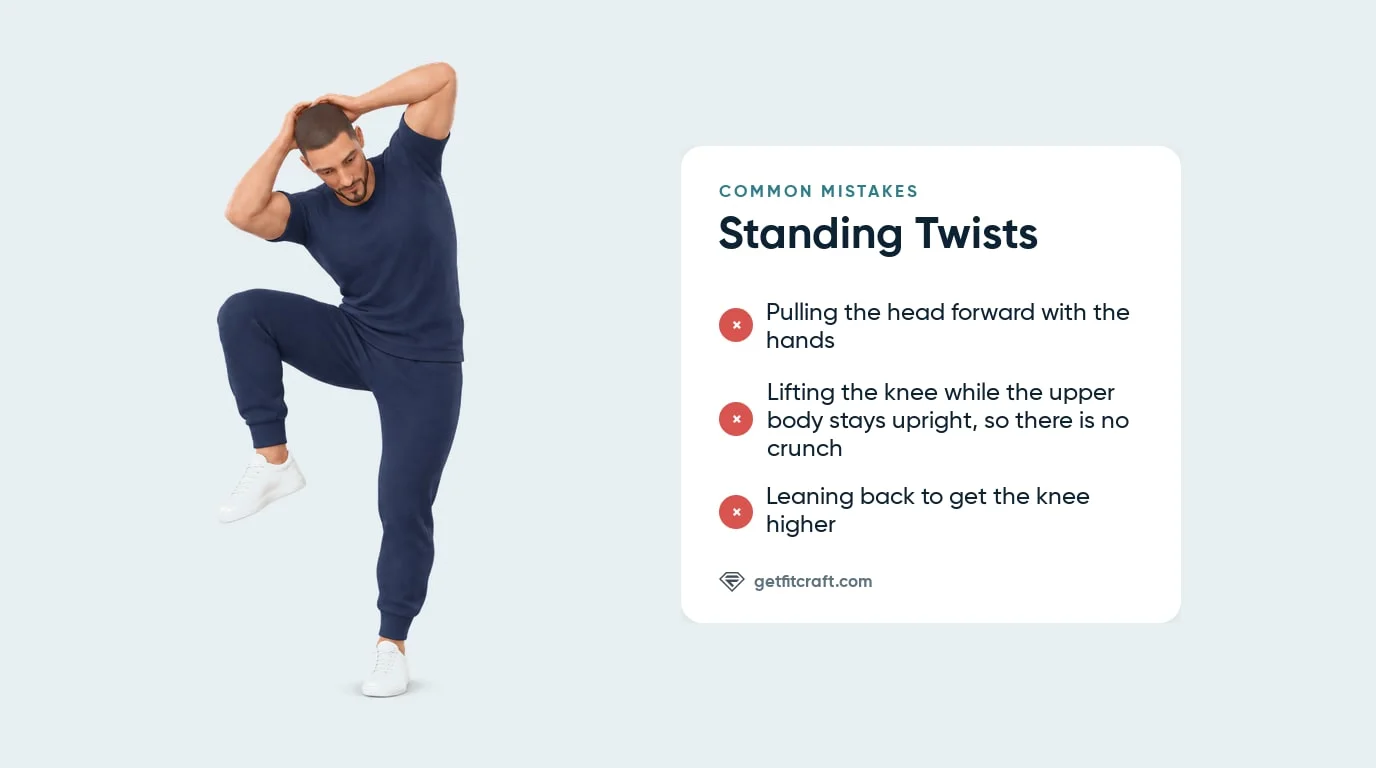
- Pulling your head forward. Yanking on your head with your hands bends your neck forward instead of working your waist. Rest your hands lightly behind your head with your elbows out wide, and keep your neck relaxed.
- Lifting the knee with no crunch. If your upper body stays upright while the knee rises, the sides of your waist have little to do. Bend your upper body toward the knee so the elbow on that side comes down toward it.
- Leaning back to get the knee higher. Leaning back to reach a higher knee takes away the bend toward the knee. Lift the knee only to about hip height, or lower, and bend toward it.
- Swinging the leg up. Kicking the knee up throws you off balance. Lift it under control on a soft standing knee, and slow down or rest one hand on a wall if you wobble.
- Locking the standing knee. Keep a small bend in the standing knee on every rep, never locked.
- Rushing. Going faster than you can control means the elbow and knee stop moving toward each other. Slow down until every rep has a clear crunch.
- Holding your breath. Breathe out as you crunch and breathe in as you stand tall. Never hold your breath.
Standing Twist Variations: Regressions and Progressions
Lower, Slower Standing Twist (Easier)
Lift your knee lower and go slower, bending only a little toward it. This keeps the same pattern while you get used to balancing on one leg.
Wall-Supported Standing Twist (Easier)
Rest one hand on a wall or the back of a sturdy chair for balance and keep the other hand behind your head. Do a few reps on one side, then switch.
Marching in Place (Beginner)
Marching in place, rated Beginner in the FitCraft app, lets you practise lifting your knee on a steady standing leg without the crunch.
Paused Standing Twist (Harder)
Pause for a second at each crunch and squeeze the side of your waist before you stand tall.
Brisk Standing Twist (Harder)
Pick up the pace while every rep still brings your elbow and knee toward each other and your standing leg stays steady.
Cross-Body Standing Twist
Bringing each elbow to the opposite knee is a common and valid version, but it is not the one the FitCraft app teaches. The app's standing twist brings each knee toward the elbow on the same side.
When to Avoid or Modify Standing Twists
Standing twists have no jumping, but they bend and turn your trunk while you balance on one leg. A burn at the sides of your waist is normal; any pain in a joint, your lower back or your neck means stop right away, and so do dizziness, light-headedness, chest pain or pressure, or being unusually short of breath. Always consult your physician or physical therapist for personalized guidance.
- Lower-back or neck pain, or a known disc problem. Have it checked by a doctor or physical therapist before you do standing twists, and ask them which exercises suit you. Any pain in your lower back or neck during a set means stop right away.
- Early postpartum recovery or diastasis recti. Ask your doctor, midwife, or a pelvic-floor physical therapist whether this exercise suits you and when to start. Stop for any pain, pressure, or bulging along the middle of your belly.
- Recent abdominal surgery. After a C-section, hernia repair, appendectomy, or similar procedure, get clearance from your surgeon or doctor before you do standing twists, and ask them which exercises suit you.
- Hernia or pelvic-floor symptoms. Ask your doctor or a pelvic-floor physical therapist whether this exercise suits you. Stop if you notice pain, pressure, heaviness, bulging, or leaking during a set.
- Pregnancy. Ask your doctor or midwife whether standing twists suit you at your stage of pregnancy. Stop for any pain, pressure, or dizziness.
- Dizziness, vertigo, or balance disorders. Ask your doctor or physical therapist before doing exercises that balance on one leg. If you feel dizzy, light-headed, or unsteady, stop right away.
Related Exercises
If standing twists fit your routine, these exercises are close relatives or other ways to work the same muscles:
- Similar standing crunch: High Knee-N-Crunch drives one knee up in front of you while both elbows pull down toward it. The FitCraft app rates it Intermediate.
- Knee-lift practice: Marching in place, rated Beginner in the app, gets you used to lifting your knee on a steady standing leg.
- Oblique work on the floor: Twist crunches curl and turn your trunk while you lie on your back, and Russian twists turn your chest from side to side while you sit balanced on your seat.
- Standing reach and turn: Cross-toe touches fold forward from a wide stance and reach one hand toward the opposite foot.
- Oblique work from a plank: Plank twists turn your chest and hips open to one side from a hands-and-toes position. The app rates them Expert.
- Abs on the floor: Deadbugs, forearm planks, and hand planks work the abs while you keep your back still.
- Other floor work: Bird-dogs reach one leg back from your hands and knees, and glute bridges and glute bridge partials lift your hips while you lie on your back.
How to Program Standing Twists
Program standing twists as a core or cardio block: enough reps to practise control, enough rest to keep every crunch clean, and progression only after form stays clean. The American College of Sports Medicine position stand on resistance training supports matching volume, rest, frequency, and progression to training status (Ratamess et al., 2009). It gives no set and rep ranges for standing twists themselves, so treat the table below as a practical starting point.
| Version | Sets × Reps | Rest between sets | Frequency |
|---|---|---|---|
| Easier (a lower knee lift at a slower pace, with a hand on a wall if you need it) | 2-3 × 8-12 per side | 45-60 seconds | 2-4 sessions/week |
| Intermediate (the standard standing twist, as rated in the FitCraft app) | 3 × 10-20 per side | 45-60 seconds | 3-5 sessions/week |
| Harder (a one-second squeeze at each crunch, or a brisker pace) | 3-4 × 15-30 per side | 60 seconds | 4-6 sessions/week |
Where in your workout: use standing twists in a warm-up, as a cardio station in a circuit, or near the end of a strength session as a core finisher.
Form floor over rep targets: stop the set when your elbow and knee stop moving toward each other, you start pulling on your head, or you keep losing your balance even with a lower knee lift. Any pain in your lower back, your neck or a joint means stop right away. Clean reps matter more than hitting a rep number.
How FitCraft Programs This Exercise
Standing twists are easy to rush because they feel low-stakes. Knowing how many reps to do, how fast to go, and when to slow down is where most people get stuck.
FitCraft maps your level, goals, and equipment during the diagnostic and builds a plan around them. The app has one standing twist exercise, rated Intermediate and filed under cardio, and can include it in your plan.
Its 3D demonstration shows the version this guide teaches: hands light behind the head, one knee up and out to the side, and the elbow on that same side coming down toward it, at about a second and a half per side.
Frequently Asked Questions
What muscles do standing twists work?
Standing twists mainly work the obliques, the muscles on the sides of your waist, which bend your upper body toward the rising knee and add a small turn. The rectus abdominis, the long muscle down the front of your belly, helps by adding the slight forward curl as you crunch.
Can I do standing twists with lower-back pain?
Not while your back hurts. A burn at the sides of your waist is normal, but any pain in your lower back, your neck or a joint during standing twists means stop right away. If you have lower-back pain, see a doctor or physical therapist first and ask which exercises suit you.
Are standing twists good cardio?
They raise your heart rate with no equipment, and the FitCraft app files them under cardio. Use a steady rhythm of about a second and a half per side for timed sets, and pick up the pace only while every crunch stays controlled. They work well in a warm-up or as a core and cardio station in a circuit.
How many standing twists should beginners do?
Start with 2 to 3 sets of 8 to 12 reps per side, resting 45 to 60 seconds between sets. The FitCraft app rates standing twists Intermediate, so begin with a lower knee lift at a slower pace, and add reps or pace only when every rep stays balanced and controlled.
What is the difference between standing twists and Russian twists?
Standing twists are done standing: you lift one knee and bend toward it, so you balance on one leg as you crunch. Russian twists are done sitting, leaning back with your feet off the floor as you turn your chest from side to side. Both work the obliques. The FitCraft app rates standing twists Intermediate and Russian twists Advanced.