Toe touch kicks look simple until you try to keep them crisp. Each rep asks for a controlled kick, a reach of both hands toward the foot, a tall overhead reset, and enough balance to switch legs smoothly.
The exercise works best as cardio. If you can touch your toes with control, fine. If not, reach for your shin and keep the same rhythm. A controlled kick and reach matter more than how low your hands go.
Quick Facts: Toe Touch Kicks
- Equipment needed: None
- Difficulty: Expert in the FitCraft app (lower, slower kicks or marching in place make it easier)
- Modality: Cardio / conditioning
- Body region: Hips, core and shoulders
Muscles & Systems Worked
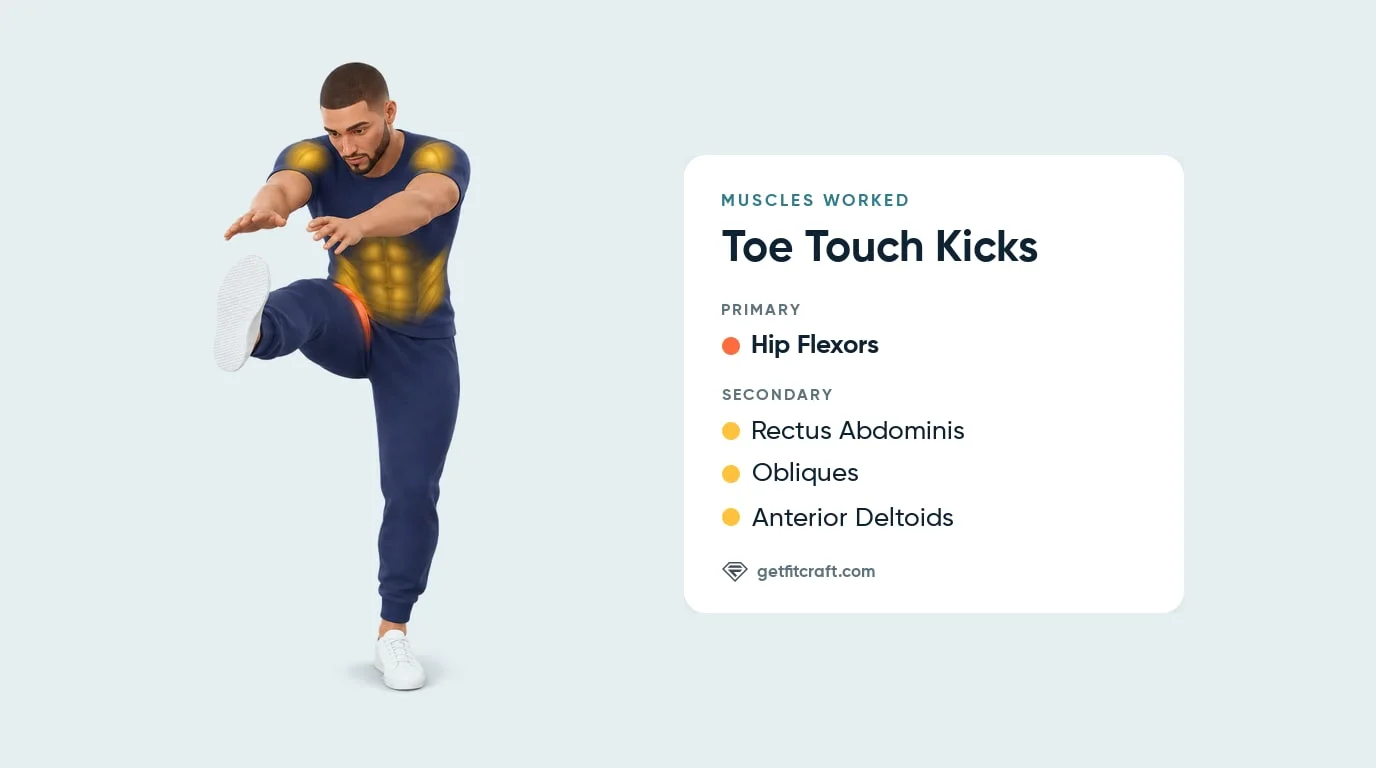
Primary muscles: the hip flexors. These muscles at the front of your hip, where the thigh meets the pelvis, lift the kicking leg up in front of you and then lower it under control.
Secondary muscles: the rectus abdominis, the obliques and the anterior deltoids. The rectus abdominis, the long muscle on the front of your belly, curls your trunk forward toward the leg as your arms come down. The obliques, at the sides of your waist, help that curl and the small turn and side bend toward the kicking leg. The anterior deltoids, at the front of your shoulders, lift your arms back overhead after every kick and control them on the way down.
Heart rate: every kick moves your leg, your trunk and both arms through a big range, so your heart rate climbs quickly over a set. No study measuring muscle activity in toe touch kicks was found, so this page describes each muscle by what it does in the move.
Step-by-Step: How to Do Toe Touch Kicks
- Set your tall starting position. Stand tall with your feet about hip-width apart, knees soft, and both arms reaching straight up overhead. No equipment is needed.
Tip: Bring your arms all the way up and stand tall before each kick.
- Kick one leg forward. Kick your right leg up in front of you and a little out to the right (straight ahead is fine too), to about hip height or lower, with the knee nearly straight but never snapped or locked. Kick only as high as you can control, and do not lean back to get the leg higher. Keep your standing knee soft; it can bend a little or a fair amount as you kick.
Tip: Keep your standing foot flat on the floor. A lower kick you control is better than a high, sloppy one.
- Reach both hands toward the foot. As the leg rises, sweep both arms forward and down and reach both hands toward your right foot, letting your trunk lean and curl forward a little. Touching your toes is never a must: reach only as far as is comfortable, and your shin is far enough.
- Reset and switch sides. Lower the kicking leg under control instead of letting it drop, stand tall, and lift both arms back overhead. Then kick with your left leg and reach both hands toward your left foot.
- Keep a brisk, controlled rhythm. Alternate legs at a brisk, controlled pace of about two seconds per kick. Breathe out as you kick and reach, breathe in as your arms go back up overhead, and never hold your breath. End the set when your kicks turn sloppy or your balance slips.
Get this exercise in a personalized workout
FitCraft, our mobile fitness app, uses its AI coach Ty to program conditioning work like this into your plan at the right volume and intensity, based on your level, goals, and equipment. Ty was designed and trained by Domenic Angelino, MPH (Brown University) and NSCA-CSCS, with research published in the Journal of Strength and Conditioning Research and Medicine & Science in Sports & Exercise.
Take the Free Assessment Free • 2 minutes • No credit card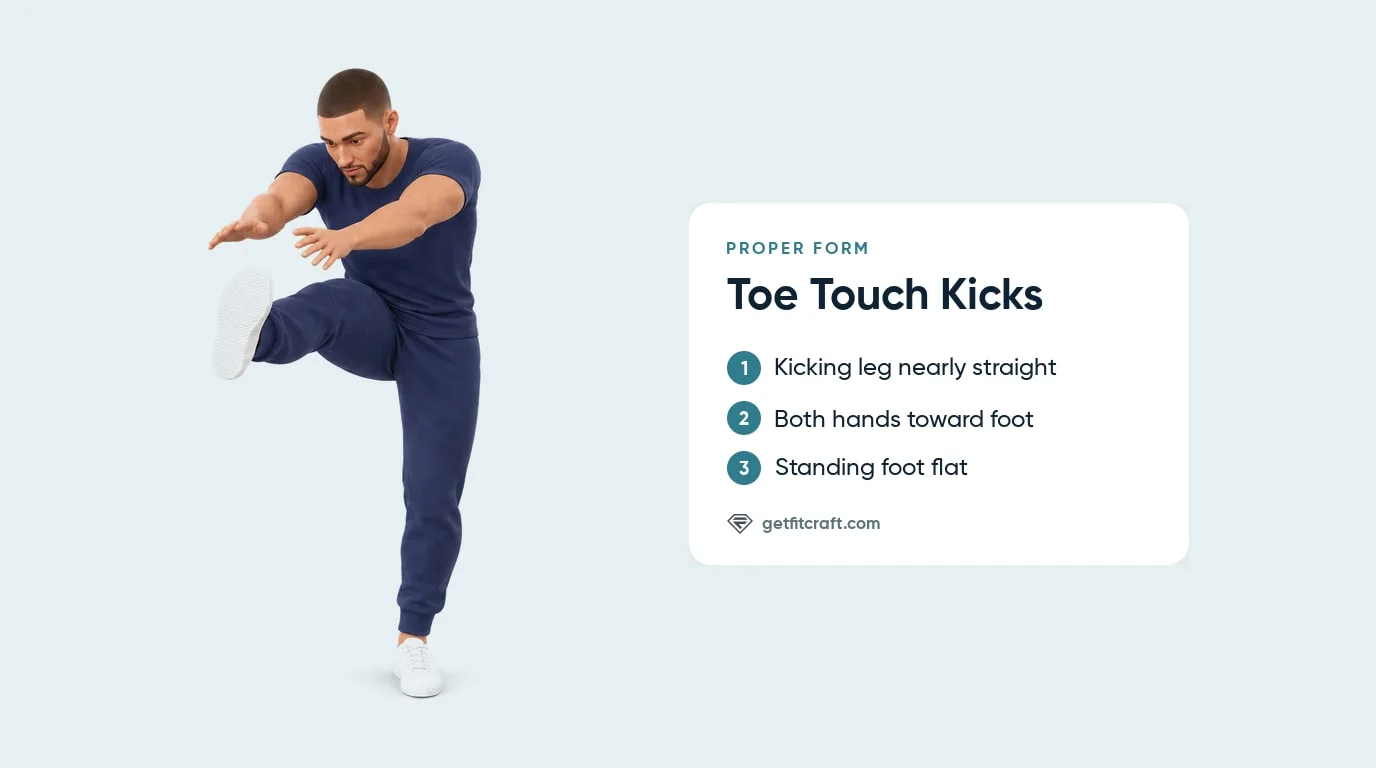
Common Mistakes
Rounding Hard to Reach the Toe
What it looks like: You chase the foot by collapsing into a deep C-shape through the spine.
Why it's a problem: Forcing the reach, or bouncing to get lower, turns a controlled curl into a strained stretch. Your lower back should never hurt.
The fix: Reach both hands toward your foot only as far as is comfortable; your shin is far enough. If the back of your kicking leg feels tight, bend that knee a little more and kick lower.
Throwing the Kicking Leg
What it looks like: The leg whips up, the torso leans back, and the foot slams down.
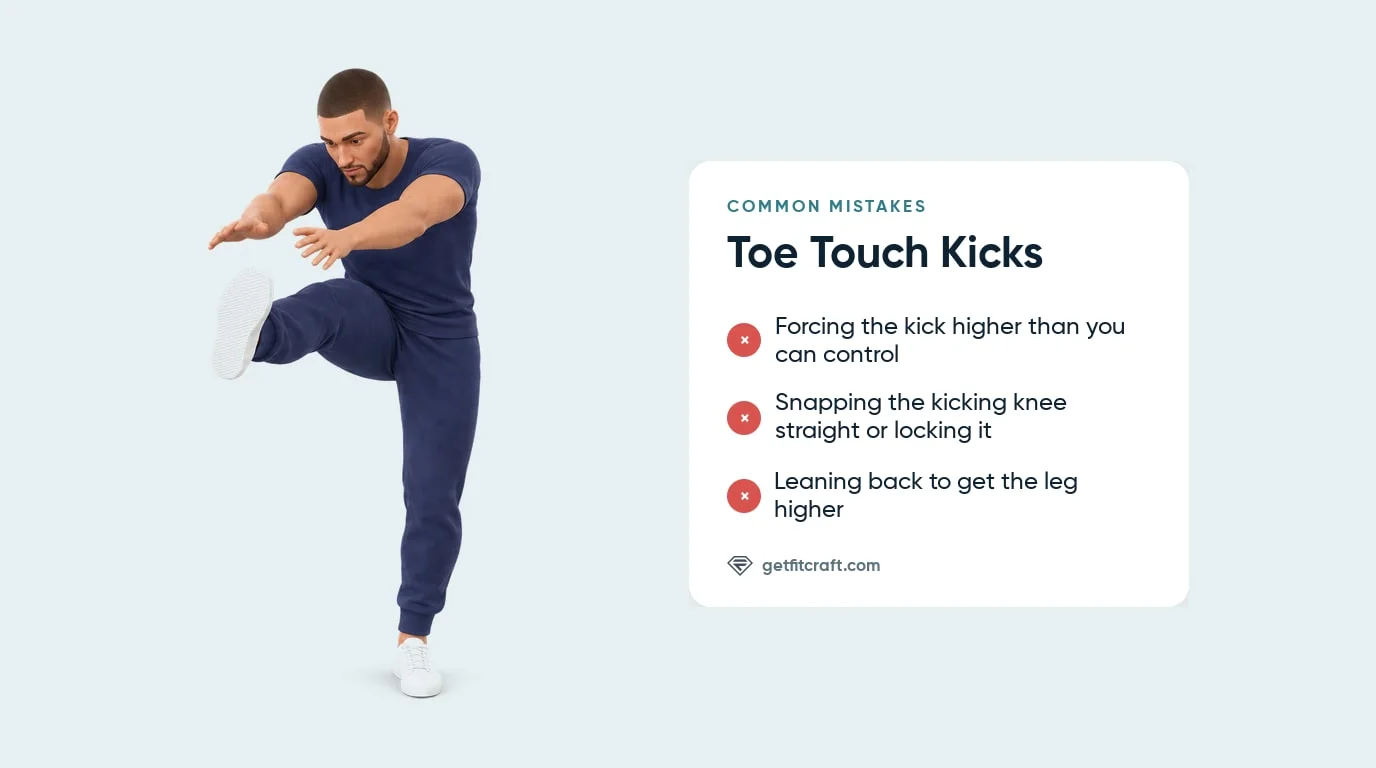
Why it's a problem: Momentum takes over, your balance gets worse, and the kick goes higher than you can control. Overextended kicks and locked knees are common beginner mistakes in kick-based cardio.
The fix: Kick only as high as you can control, about hip height or lower, with the knee nearly straight but never snapped or locked. Lower the leg under control instead of letting it drop, and keep your trunk from leaning back.
Skipping the Overhead Reset
What it looks like: Your hands hover near chest height between reps.
Why it's a problem: The exercise gets smaller, the shoulders do less work, and the conditioning demand drops.
The fix: Drive both arms fully overhead before the next kick. Think tall, fold, tall, fold.
Letting One Side Dominate
What it looks like: One leg kicks higher and faster while the other side turns into a low tap.
Why it's a problem: Both legs should do the same work, and a lopsided set builds in differences in balance and kick height between your sides.
The fix: Alternate every kick, right then left, and let the side that feels less steady set the kick height for both.
Rushing the Pace or Holding Your Breath
What it looks like: The kicks speed up until they turn sloppy, and you hold your breath to get through the set.
Why it's a problem: Rushed kicks lose control and balance, and you should never hold your breath while you exercise.
The fix: Keep a brisk, controlled pace of about two seconds per kick. Breathe out as you kick and reach, and breathe in as your arms go back up.
Toe Touch Kick Variations: Regressions and Progressions
The FitCraft app teaches one version, the alternating toe touch kick described above with both hands reaching toward the kicking foot, and rates it Expert. Reaching the opposite hand across to the foot is a common version too, but it is not the app's.
Easier Variations
- Lower, slower toe touch kicks. Kick lower with a softer knee, slow the pace down, and reach both hands toward your shin instead of your foot.
- Marching in Place. Lift your knees in place instead of kicking a straight leg. The FitCraft app rates it Beginner.
- High Knee-N-Crunch. Drive a bent knee up and crunch down toward it instead of kicking. The FitCraft app rates it Intermediate.
Harder Variations
- Quicker toe touch kicks. Pick up the pace a little, keeping every kick controlled and your standing foot steady.
- Slightly higher toe touch kicks. Kick a little higher, but only while the kick stays smooth and you feel no pulling at the back of your leg.
Alternative Conditioning Moves
- High Knees. A faster knee-lift drill with bent knees and no reach toward the foot.
- Squat Twist. A rotational cardio option that keeps both feet grounded between reps.
- Mountain Climbers. A grounded hip-flexor and core alternative when standing balance is the limiter.
When to Avoid or Modify Toe Touch Kicks
Toe touch kicks are safe for many healthy adults, but the conditions below call for a doctor's or physical therapist's advice first. A stretch or burn in the working muscles is normal; any pain in a joint, your lower back or your neck means stop the exercise. Always consult your physician if you have a medical condition or exercise limits from a clinician.
- Known cardiovascular disease or uncontrolled hypertension. Toe touch kicks raise your heart rate quickly. Get your doctor's clearance first, and ask them which intensity fits you. Stop right away if you feel chest pain or pressure, dizziness, or unusual shortness of breath.
- Lower-back pain. Any pain in your lower back during toe touch kicks means stop. Get checked by a doctor or physical therapist before you do them again.
- A strain or injury at the back of the thigh. The kick lifts a nearly straight leg, which stretches the back of the thigh. Do not do toe touch kicks while that area is injured or hurts; see a doctor or physical therapist, and let them decide when you can kick again. Stop right away if you feel a sudden pull at the back of your thigh during a kick.
- Balance disorders, vertigo, or vestibular symptoms. Kicking on one leg while you reach toward your foot raises the risk of a fall. Check with your doctor or physical therapist first. Stop and sit down if you feel dizzy or light-headed.
- Pregnancy, early postpartum recovery, or pelvic-floor symptoms. Check with your doctor, midwife or a pelvic health physical therapist before you do toe touch kicks, and ask them which exercises fit your stage. Any pain in your hips, lower back or pelvis, any pelvic-floor pressure or leaking, or feeling dizzy means stop.
- Acute knee, ankle, hip, shin, or foot injury. Your standing leg carries every kick. Do not do toe touch kicks while any of these hurts. See a doctor or physical therapist, and let them decide when you can do them again.
Related Exercises
- Lower-impact alternative: Marching in Place keeps the standing cardio rhythm without the straight-leg kick.
- Another cardio knee lift: High Knees trains fast knee lifts with a simpler trunk position.
- Side-to-side option: Side Lunge Toe Touch moves the reach into a wide side lunge.
- Core stability foundation: Deadbugs and Forearm Planks build trunk control before faster standing work.
- Lower-leg work: Calf Raises and Calf Hops train the calves, which toe touch kicks do not target.
How to Program Toe Touch Kicks
Toe touch kicks are usually programmed by time, with work and rest intervals. The American College of Sports Medicine position stand defines progressive overload as a gradual increase in training stress, such as more repetitions, more load, or more total volume (Ratamess et al., 2009). It does not set intervals for toe touch kicks, so the ranges below are practical starting points, not figures from a study.
| Level | Work interval | Rest between sets | Frequency |
|---|---|---|---|
| Starting out (lower, slower kicks or marching in place) | 20-30 sec | 60-90 sec | 2-3 sessions/week |
| Expert (the app's version) | 30-45 sec | 45-60 sec | 3-4 sessions/week |
| Harder (a slightly quicker pace, every kick controlled) | 45-60 sec | 30-45 sec | 3-5 sessions/week |
Where in your workout: use toe touch kicks in a standalone HIIT session, after strength training as a short finisher, or inside a bodyweight conditioning circuit. Avoid placing them before heavy lower-body strength work, because tired legs make balance harder to control.
Form floor over time targets: the set ends when you start rounding hard to reach, letting the leg drop, or losing the side-to-side rhythm. A shorter interval of controlled kicks beats a longer, sloppy one.
Frequently Asked Questions
What muscles do toe touch kicks work?
Toe touch kicks mainly work the hip flexors, at the front of your hip, which lift the kicking leg. The rectus abdominis, on the front of your belly, curls your trunk forward toward the leg as your arms come down, and the obliques, at the sides of your waist, help that curl and the small turn toward the kicking leg. The anterior deltoids, at the front of your shoulders, lift your arms back overhead after every kick.
Are toe touch kicks beginner friendly?
The FitCraft app rates toe touch kicks Expert, so if you are new to them, start with an easier version: kick lower with a softer knee and slow down, march in place lifting your knees instead of kicking, or drive a bent knee up and crunch toward it. Move on to the full version when you can kick to about hip height with control while your standing knee stays soft.
Why can't I touch my toe during toe touch kicks?
Usually because the back of your kicking leg feels tight, or because you cannot yet kick that high with control and balance. You do not have to touch your toes: reach both hands toward your foot and stop where it feels comfortable, since your shin is far enough. If the back of your leg feels too tight, bend that knee a little more and kick lower. Never round hard or bounce to reach the toes.
Can I do toe touch kicks if I have high blood pressure?
Check with your doctor first if you have high blood pressure, heart disease or recent heart symptoms, or if a clinician has given you heart-rate limits, and ask them which intensity fits you. Toe touch kicks raise your heart rate quickly, so keep breathing and never hold your breath. Stop right away if you feel chest pain or pressure, dizziness, or unusual shortness of breath.
How long should I do toe touch kicks?
Start with 20 to 30 seconds of controlled kicks at about two seconds per kick, then rest 60 to 90 seconds. Build toward 30 to 45 second work intervals as that gets easier. Stop early if the kick turns sloppy, your back rounds hard, or your balance fades.