The seated side bend stretches the side of your waist with your hips anchored on the floor. Bending straight sideways lengthens the obliques on the side that faces up, and the cross-legged seat opens your inner thighs and hips at the same time.
Done well, it feels like a long stretch along the side of your waist. Done poorly, it turns into a forward lean or a twist. The fix is usually small: sit taller, keep both sitting bones down, and bend only sideways.
Quick Facts: Seated Side Bend
- Equipment needed: None (a folded blanket to sit on is optional)
- Difficulty: Intermediate (as rated in the app for all four exercises); a blanket under your hips or a smaller bend makes it easier
- Modality: Stretch (a hold or a slow moving version)
- Body region: Side of the waist, inner thighs and hips
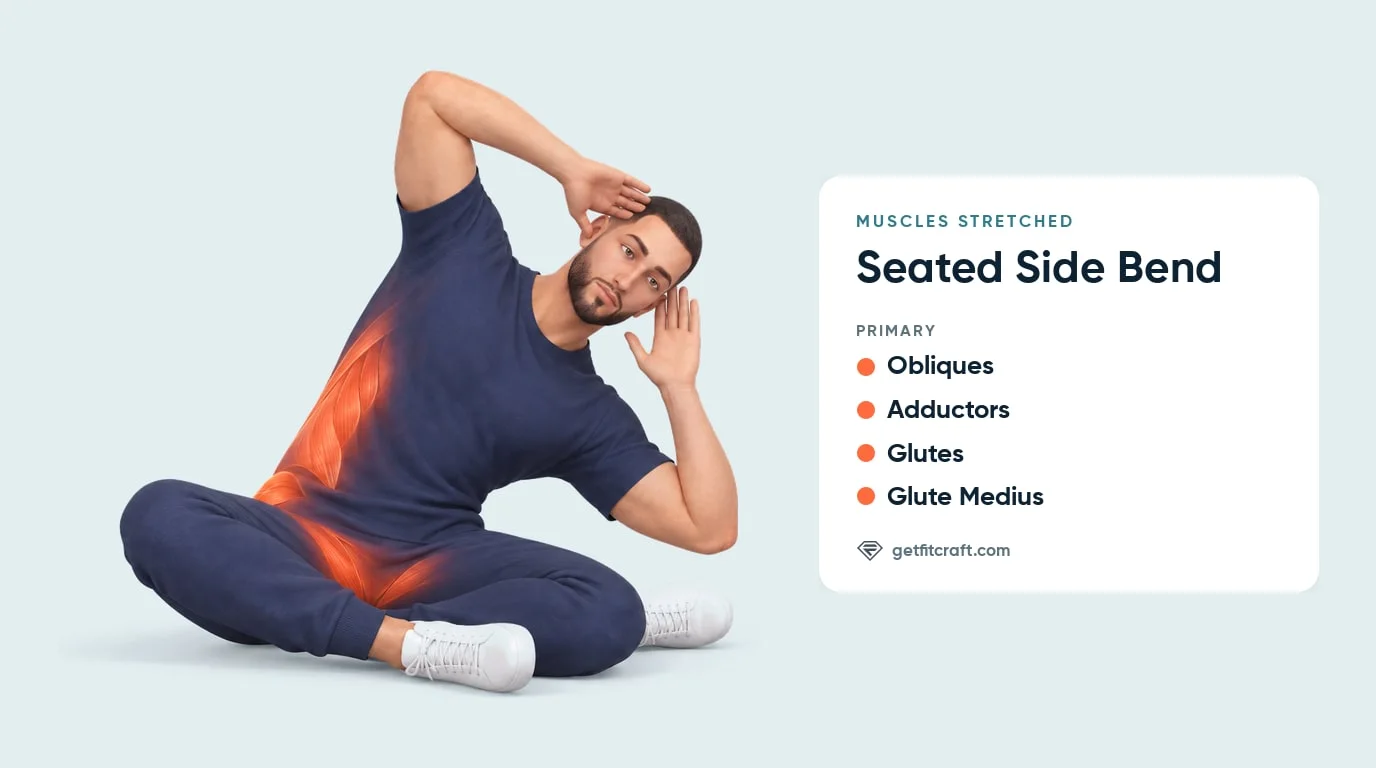
Muscles Stretched
Muscles stretched: the obliques, the adductors, the glutes and the glute medius. The seated side bend is a stretch for all four, not a strength exercise.
Obliques: the obliques run along the sides of your waist and bend your trunk toward their own side. When you bend to one side, the obliques on the other side lengthen, so the stretch runs along the side of the waist that faces up. Each side gets its turn when you switch.
Adductors, glutes and glute medius: the cross-legged seat bends your hips and lets your knees drop open. That gently lengthens the adductors along your inner thighs and the back and outer sides of your hips, where the glutes and the glute medius sit.
Where you should feel it: along the side of your waist that faces up, plus a gentle opening in your hips and inner thighs from the seat. You should not feel it in your neck or lower back, and any pain in your lower back, neck, hips or knees means stop. No study we found has measured the seated side bend itself, so these descriptions come from the shape of the stretch.
Step-by-Step: How to Do the Seated Side Bend
The steps below teach the app's version: a cross-legged seat with your fingertips resting at your head. One hand on the floor with the other arm reaching overhead is a valid alternative, covered under the variations.
Step 1: Sit Cross-Legged with Grounded Hips
Sit cross-legged on the floor with both sitting bones down, your knees dropped open and each foot under or in front of the opposite shin. Sit tall. If your knees ride above your hips or your lower back rounds, sit on a folded blanket so your spine can stay tall.
Step 2: Rest Your Fingertips at Your Head
Rest your fingertips lightly at the sides or back of your head, with your elbows bent and out wide. Keep your chest open and your shoulders relaxed.
Tip: your hands only rest on your head. Never pull on your head or neck.
Step 3: Bend Directly to the Side
Keeping both hips planted, bend your trunk straight to one side and lower that elbow toward its hip. Keep your chest facing forward and your head in line with your spine. Stop when you feel a gentle stretch along the opposite side of your waist; a small bend is fine.
Tip: imagine you are sitting between two walls. Bend sideways without leaning forward, leaning back or twisting, and keep both sitting bones on the floor.
Step 4: Hold or Move Slowly
For the hold, stay in the bend for the time the workout sets, breathing slowly and steadily. For the moving version, come back up to about upright and bend again, about four seconds a rep with a short pause in the bend. Keep it slow and smooth, and never bounce at the end of the bend.
Step 5: Switch Sides
Come back up to upright with control and give the other side the same time or the same number of reps.
Get this exercise in a personalized workout
FitCraft, our mobile fitness app, uses its AI coach Ty to program core stability work like this into your plan at the right volume and intensity, based on your level, goals, and equipment. Ty was designed and trained by Domenic Angelino, MPH (Brown University) and NSCA-CSCS, with research published in the Journal of Strength and Conditioning Research and Medicine & Science in Sports & Exercise.
Take the Free Assessment Free • 2 minutes • No credit card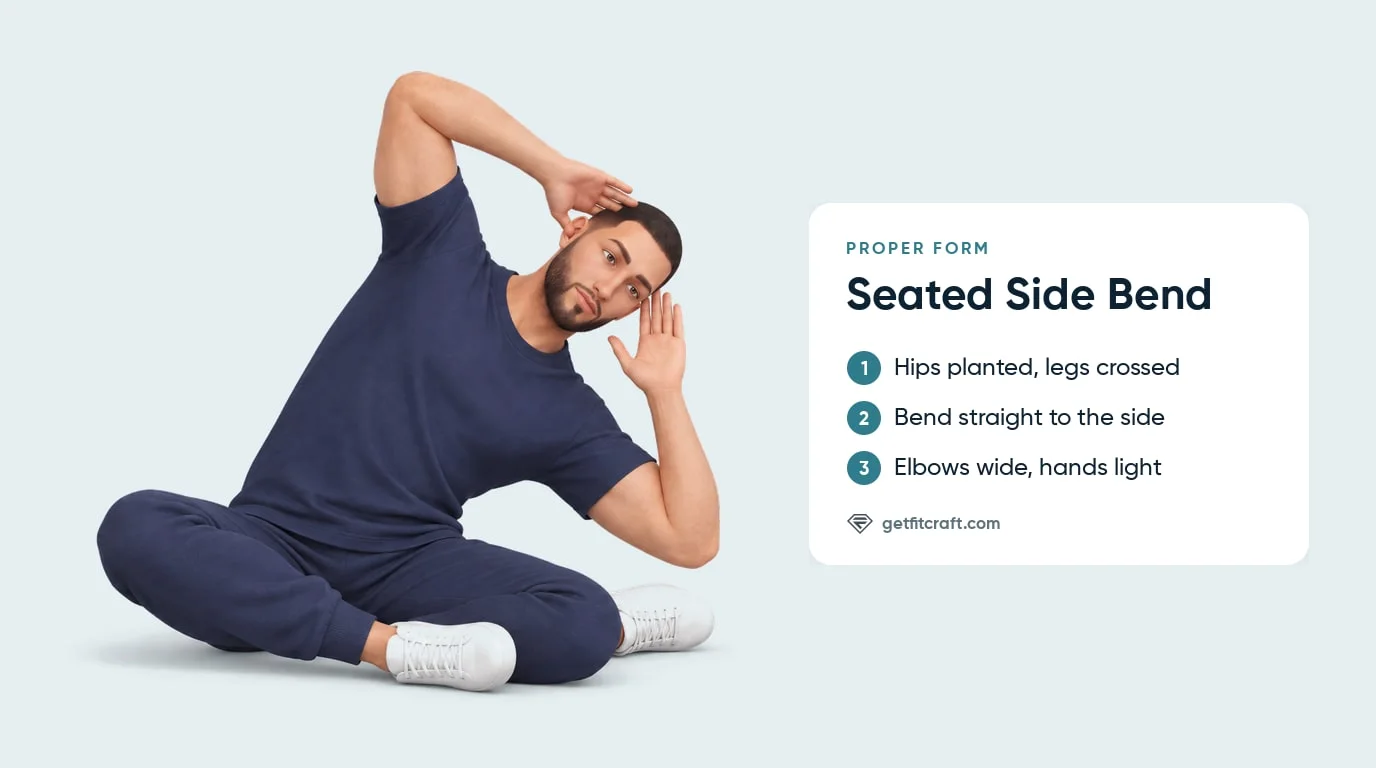
Common Mistakes (and How to Fix Them)
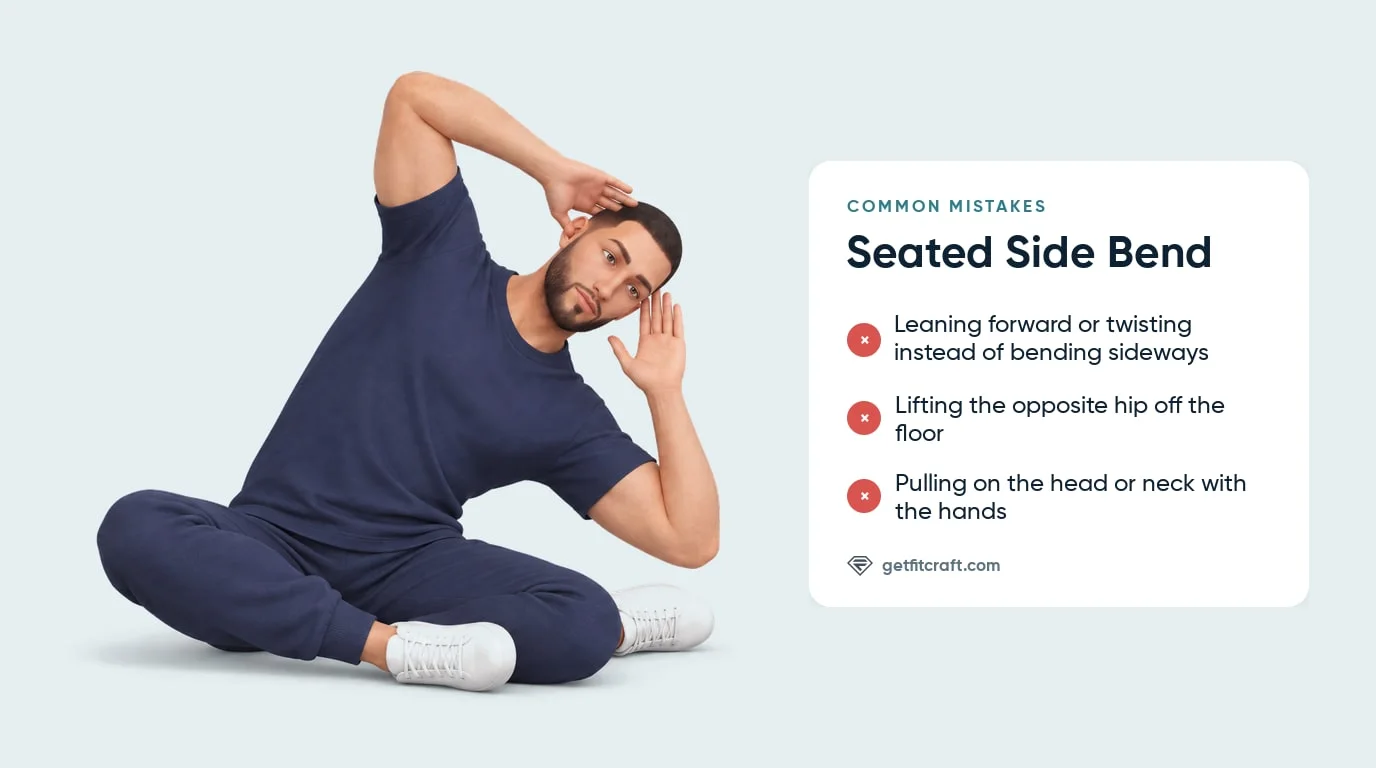
- Leaning forward or twisting. Tipping forward or turning your chest to go lower turns the side bend into a fold or a twist. Bend straight to the side with your chest facing forward, and make the bend smaller if you need to.
- Lifting the opposite sitting bone. Keep both sitting bones on the floor. If one hip lifts, bend a little less until both stay down.
- Pulling on your head or neck. Your fingertips only rest on your head with the elbows wide. Never pull; keep your neck long and relaxed.
- Bouncing or rushing. Move slowly into the bend and pause there. Never bounce at the end of the bend, in the hold or in the moving version.
- Slumping with a rounded lower back. Sit tall before you bend. If your lower back rounds in the cross-legged seat, sit on a folded blanket.
- Holding your breath. Breathe slowly and never hold your breath. Breathing out as you bend helps you relax into the stretch.
- Doing only one side. Give the other side the same time or the same number of reps.
Seated Side Bend Variations: Regressions and Progressions
Blanket-Supported Side Bend (Easier)
Sit on a folded blanket so your knees are level with or below your hips, and bend only a little way, just until you feel a gentle stretch along your side.
Support-Hand Side Bend (Easier)
Rest one hand on the floor beside the hip you bend toward, and keep the other hand at your head. Bend only as far as both sitting bones stay down.
Seated Side Bend Hold (Intermediate in the App)
The version in the step-by-step above: a cross-legged seat, fingertips at the head and a straight sideways bend held for the time the workout sets. The app has a hold for each side.
Moving Seated Side Bend (Intermediate in the App)
Bend to one side, pause briefly, come back up to about upright and bend again, about four seconds a rep. Keep it slow and smooth, never bouncy. The app has a moving version for each side.
Overhead-Reach Side Bend (Harder)
Reach your top arm long over your head as you bend, instead of keeping that hand at your head. You can rest the other hand on the floor beside the hip you bend toward. For a standing side stretch, try triangle pose, also rated Intermediate in the app.
When to Avoid or Modify Seated Side Bends
A stretch along the side of your waist and in your hips is normal in the seated side bend. Any pain in your lower back, neck, hips or knees means stop right away, and so does feeling dizzy or lightheaded. If any of the following applies to you, see a doctor or physical therapist before you do seated side bends.
- Lower-back pain or known disc problems. See a doctor or physical therapist before you do seated side bends, and ask them which exercises suit you. Any lower back pain during the stretch means stop.
- Recently postpartum or active diastasis recti. Ask your doctor or a physical therapist when side bends and other trunk stretches fit your recovery. Any pain in your back, belly or pelvis means stop.
- Recent abdominal surgery or hernia. Get your surgeon's or doctor's okay before you do seated side bends. Any pain in your belly or near the surgery site means stop.
- Pregnancy. Check with your doctor or midwife before you do seated side bends, and ask them which version fits each stage of your pregnancy. Never hold your breath. Any pain in your back, belly or pelvis, or feeling dizzy, means stop.
- Pelvic-floor dysfunction or pelvic-organ prolapse. See a pelvic-floor physical therapist or your doctor before you do seated side bends, and ask them which stretches suit you. Any pain or pressure in your pelvis means stop.
- Hip or knee pain when sitting on the floor. Any hip or knee pain in the cross-legged seat means stop. See a doctor or physical therapist before you try floor stretches again.
Related Exercises
Use these exercises to add oblique strength, round out a stretching routine, or move your spine in other directions:
- Oblique strength: Side Planks and Side Plank Raise work the obliques as you hold your body up on one side; the app rates both Advanced.
- Standing oblique work: Standing Twists work the obliques as you bend toward a lifted knee, and Cross-Toe Touches work the glutes, hamstrings, lower back and obliques as you fold and turn toward the opposite foot.
- Spinal mobility pairing: Cat-Cow and Seated Cat Cow move the spine through rounding and arching, which pairs well with bending to the side.
- Core strength: Deadbugs and Forearm Planks work the front abs and the deep core, and Bird-Dogs work the glutes.
- Floor stretches: Butterfly Pose stretches the inner thighs and Cobra Pose stretches the front of the stomach, so they make a simple floor stretching routine with the seated side bend.
How to Program Seated Side Bends
Seated side bends are a stretch, so they are programmed by hold time or slow reps rather than sets of strength reps. The American College of Sports Medicine recommends flexibility exercises on 2 or more days a week, with a total of about 60 seconds per stretch (Garber et al., 2011). ACE's seated side-straddle stretch, the same side bend from a wider seat, is held 15 to 30 seconds, 2 to 4 times per side, or done as 5 to 10 slow reps each way (ACE).
| Version | Hold or reps | Each side | Frequency |
|---|---|---|---|
| Easier (blanket, smaller bend or support hand) | 15 to 30 second holds at a gentle stretch, about 60 seconds in total | Same time on both sides | 2 or more days a week |
| Seated side bend hold (Intermediate in the app) | The time the workout sets, or 15 to 30 seconds, 2 to 4 times | Same time on both sides | 2 or more days a week |
| Moving seated side bend (Intermediate in the app) | 5 to 10 slow reps, about 4 seconds each with a short pause in the bend | Same number on both sides | 2 or more days a week |
Where in your workout: use seated side bends in a cooldown, at the end of a yoga or mobility session, or in a short stretching routine with cat-cow and butterfly pose.
Form over time targets: come out of the hold when your opposite sitting bone lifts, your chest turns or tips forward, or your breathing gets tight. Any pain in your lower back, neck, hips or knees means stop.
How FitCraft Programs This Exercise
FitCraft maps your level, goals, and equipment during the diagnostic and builds a plan around them. The app has four seated side bend exercises, a hold and a moving version for each side, all rated Intermediate, and can include them in your plan.
Its 3D demonstrations show the app's version: sitting cross-legged with both hips down, the fingertips resting at the head with the elbows wide, and a straight sideways bend. The moving version bends, pauses briefly and comes back up, about four seconds a rep.
Frequently Asked Questions
What muscles does the seated side bend work?
The seated side bend is a stretch, not a strength exercise. It stretches the obliques along the side of the waist that faces up, and the cross-legged seat gently stretches the adductors of the inner thighs and the glutes and glute medius at the back and outer side of the hips.
Why do I feel the seated side bend in my lower back?
You should feel the stretch along the side of your waist and gently in your hips, not in your lower back. Any lower back pain means stop right away, and see a doctor or physical therapist before you try it again.
How long should I hold a seated side bend?
Hold for the time the workout sets, breathing slowly, then give the other side the same time. ACE's seated side-straddle stretch, the same side bend from a wider seat, is held 15 to 30 seconds, 2 to 4 times per side, and the American College of Sports Medicine suggests about 60 seconds in total per stretch. There's no need to strain to stay longer. In the app's moving version, each slow rep takes about four seconds.
What if sitting cross-legged is uncomfortable?
Sit on a folded blanket so your knees can drop level with or below your hips, and let your feet slide a little farther forward so your knees can relax open. If your knees or hips hurt, stop.
Can I do seated side bends with lower-back pain?
Not if it hurts. Any lower back pain during the stretch means stop right away. If you have lower back pain, disc symptoms or another back condition, see a doctor or physical therapist before you do seated side bends, and ask them which exercises suit you.