The corner row is one of the most accessible back exercises there is. You need no bar, no bands, and no doorway that might not hold your weight, just a wall corner. Many no-equipment home workouts are mostly push-ups, planks, squats, and lunges, which give the upper back little to do. The corner row fills that gap: it trains the muscles that squeeze your shoulder blades together and draw your arms back, with your body weight as the load.
The setup is simple. You lean back onto your arms against the two walls, and how far your feet are from the corner sets how hard it is. You don't need a gym membership to start training your upper back. You need a corner.
The FitCraft app has one corner row, rated Beginner, with an interactive 3D demonstration. If you have nothing at all, no bar, no table sturdy enough for inverted rows, no door frame you trust, the corner row is a good place for your back training to start.
Quick Facts: Corner Row
- Equipment needed: None, just an inside wall corner
- Difficulty: Beginner (as rated in the FitCraft app); step closer to the corner to make it easier or farther out to make it harder
- Modality: Strength
- Body region: Upper body (back and rear shoulders)
Muscles Worked
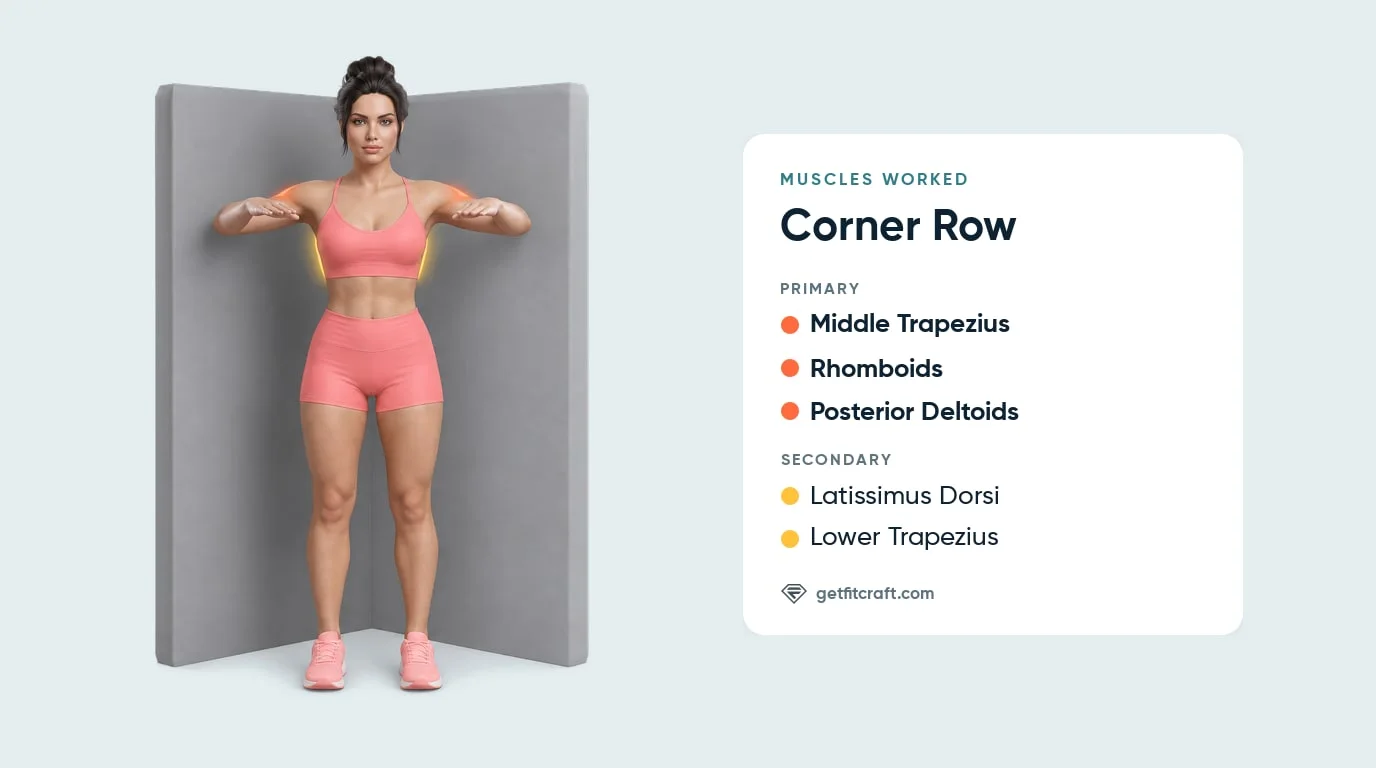
Primary movers: the middle trapezius, rhomboids, and posterior (rear) deltoids. The middle trapezius and rhomboids, between your shoulder blades, squeeze the shoulder blades together as you press away from the corner. The posterior deltoids, at the backs of your shoulders, draw your upper arms back into the walls. These muscles shorten as you press away and lengthen under control as you lean back into the corner.
Secondary movers: the latissimus dorsi and lower trapezius. The lats, along the sides of your back, help a little to draw your arms back while your elbows stay at shoulder height; they do more if your elbows slide lower down the walls. The lower trapezius keeps your shoulder blades down so your shoulders don't shrug toward your ears.
Why elbow height matters: keep your elbows at about shoulder height; a little below is fine. With the elbows that high, the muscles between your shoulder blades and the backs of your shoulders do most of the work. If your elbows tuck well below your shoulders, the work shifts toward your lats and away from the backs of your shoulders.
How to Do a Corner Row (Step-by-Step)
The corner row uses an inside wall corner to give you something to press against. The cues below apply at any foot distance, whether you stand nearly upright or lean back a little farther.
Step 1: Stand With Your Back to the Corner
Stand with your back to an inside corner where two walls meet. Set your feet about hip width apart and a short step or two out from the corner.
Tip: Use a solid corner and a floor where your shoes will not slip. Start close to the corner and step out only as it gets easy.
Step 2: Set Your Arms on the Walls
Raise your upper arms out to the sides to about shoulder height and bend your elbows to a right angle or more, so your forearms point forward with your hands open and relaxed. Lean back until the backs of your upper arms, just above the elbows, rest against the walls, one arm on each wall. Your hands touch nothing. Keep your body in one straight line from your shoulders through your hips to your heels, knees soft.
Tip: Keep your head in line with your body and off the walls, eyes looking straight ahead.
Step 3: Press Away From the Corner
Breathe out, press your elbows back into the walls, and squeeze your shoulder blades together to push your body away from the corner until you stand nearly upright with your chest open. Keep your elbows near shoulder height, your shoulders down away from your ears, and your body straight.
Tip: Let your upper back do the pressing. Your legs and core only hold your body straight, like a plank, so never push off with your legs or hips.
Step 4: Hold, Then Lean Back Slowly
Hold the squeeze for a moment, up to about three seconds, then breathe in and lean back slowly, over about a second, until your upper back sinks toward the corner and your shoulder blades spread apart. Never drop back into the corner. Re-check your body line before the next rep.
Tip: Keep breathing while you hold the squeeze; never hold your breath. If your hips sag, step your feet closer to the corner or end the set.
Get this exercise in a personalized workout
FitCraft, our mobile fitness app, uses its AI coach Ty to program pulling exercises like this into your plan at the right volume and intensity, based on your level, goals, and equipment. Ty was designed and trained by Domenic Angelino, MPH (Brown University) and NSCA-CSCS, with research published in the Journal of Strength and Conditioning Research and Medicine & Science in Sports & Exercise.
Take the Free Assessment Free · 2 minutes · No credit card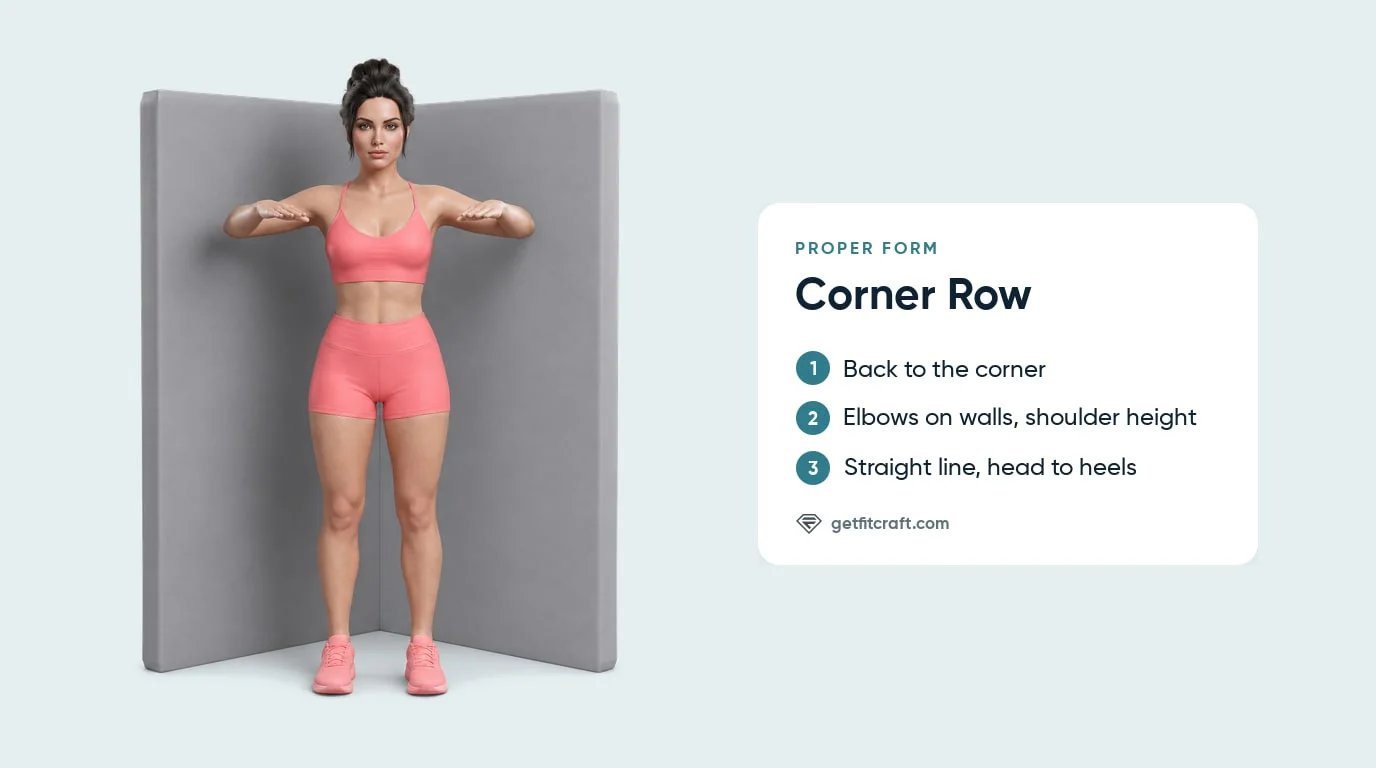
Common Mistakes (and How to Fix Them)
The corner row looks deceptively simple, but these form errors reduce its effectiveness or shift the work away from the target muscles.
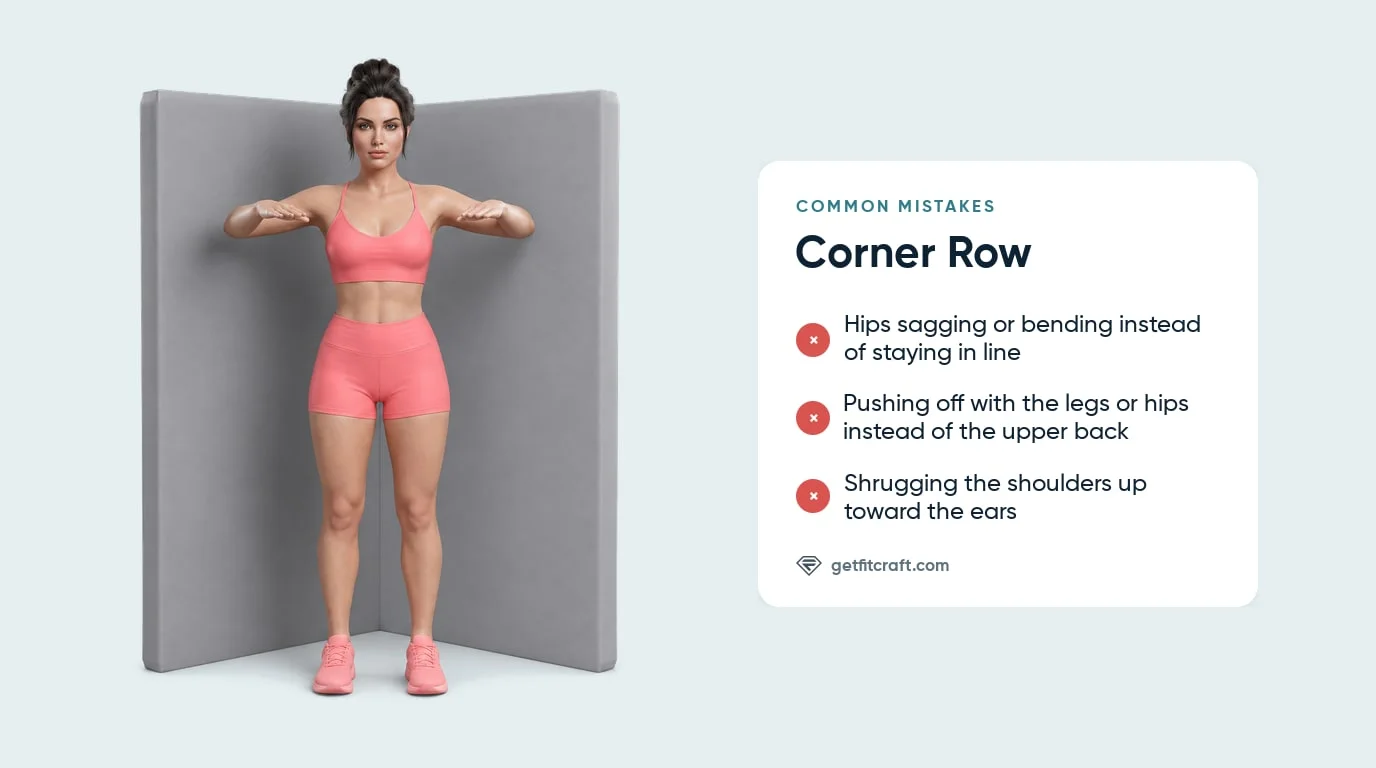
- Sagging or bending at the hips. When your trunk tires, the hips drop or bend and the straight body line breaks. Keep your glutes squeezed and your belly braced so your shoulders, hips, and heels stay in one line. If your hips sag before your upper back tires, step closer to the corner, and build trunk strength separately with forearm planks and deadbugs.
- Pushing off with the legs or hips. Driving your hips forward or pushing with your legs moves your body without your upper back doing the work. Keep your legs still and let your elbows pressing into the walls move you.
- Shrugging the shoulders up. Hiking the shoulders toward the ears as you press away moves the effort into your neck instead of your upper back. Keep your shoulders down and back throughout every rep. If you feel tension in your neck during corner rows, you're shrugging.
- Elbows sliding down the walls. If your elbows slide well below shoulder height, the work shifts toward the sides of your back and away from the backs of your shoulders. A little below shoulder height is fine; reset them close to shoulder level.
- Gripping or pushing the walls with your hands. Only the backs of your upper arms touch the walls. Keep your hands open and relaxed out in front of you.
- Dropping back into the corner. Letting your body fall back takes the control out of the second half of the rep. Lean back slowly, over about a second, every rep.
- Feet so far out you can't stay straight. Stepping out makes the exercise harder, but only while your body stays in one straight line. If your hips sag or bend, step closer to the corner. Standing close is the easier version, not a mistake.
Corner Row Variations: Regressions and Progressions
The FitCraft app has one corner row, rated Beginner. Your foot distance and the length of the squeeze make it easier or harder.
Easier: Stand Closer to the Corner
Step your feet closer to the corner so you stand more upright and lean back only a little onto your arms. Putting one foot a little behind the other also makes the press lighter and steadier, and you can hold the squeeze for just a moment.
Standard Corner Row (Beginner)
Feet a short step or two out from the corner, body leaning back slightly onto your arms in one straight line. This is the version described in the steps above and the one in the FitCraft app, rated Beginner. Hold the squeeze for a moment, up to about three seconds, on each rep, and build up to 3 sets of 15 with controlled form before making it harder.
Harder: Feet Farther Out or a Longer Hold
Walk your feet a little farther from the corner so you lean back more while your body stays straight, or hold the squeeze a few seconds longer at the top. Step back in as soon as your hips start to sag.
Next Step: Bodyweight Rows
When the corner row feels easy, the app's next step up is the bodyweight row on a suspension trainer, rated Intermediate: you lean back holding the handles and pull your chest up to them. See inverted rows for the full guide.
No Corner Free: W Raise
With no corner available, lie face down and lift your arms off the floor in a W shape. The W raise trains the same shoulder-blade muscles without a wall.
When to Avoid or Modify Corner Rows
Stop at any pain in a joint, your lower back or your neck; a burn in the muscles between your shoulder blades and at the backs of your shoulders is normal. With any of the conditions below, see a doctor or physical therapist before you do corner rows.
- Shoulder pain or a rotator cuff injury. Any shoulder pain means stop. See a doctor or physical therapist before you do corner rows; they decide when you can train your shoulders again.
- Recent shoulder or elbow surgery. Get clearance from your surgeon or physical therapist before you do corner rows; they decide how you return.
- Elbow pain, including tennis or golfer's elbow. The backs of your upper arms, just above the elbows, press into the walls on every rep. Any elbow pain means stop; see a doctor or physical therapist before you do corner rows.
- Lower-back pain. Your trunk holds a straight line while you lean back. Any lower back pain means stop; see a doctor or physical therapist before you do corner rows again.
- After giving birth, or with active diastasis recti. Holding the leaned-back body line takes steady work from your belly. Get cleared by your doctor or a pelvic health physical therapist before you do corner rows; they decide how you return.
Related Exercises
If corner rows are part of your routine, these movements complement or extend the same training pattern:
- Same muscle group (pull): Inverted Rows and Bent-Over Rows are harder pulls for the same upper-back muscles once corner rows feel easy.
- Dumbbell rows: Supported Row and Reverse Row train the same upper-back muscles with dumbbells; the FitCraft app rates them Intermediate and Advanced.
- Vertical-pull progression: Chin Negative and Top Chin Hold build the eccentric and isometric strength that bridges into full chin-ups and pull-ups.
- Grip and shoulder foundation: Engaged Hang trains your grip and keeps your shoulders drawn down while you hang from a bar.
- Core foundation: Deadbugs and Forearm Planks are core exercises that help you hold a straight body line, and Bird-Dogs train the glutes and the muscles along your spine.
- Loaded back accessory: Overhead Pullover and Pull-Apart add isolated lat and rear-deltoid work using dumbbells or a band.
How to Program Corner Rows
The American College of Sports Medicine (ACSM) Position Stand on resistance training recommends making training harder in small steps as you get stronger and setting how often you train by experience: 2 to 3 days a week for beginners, 3 to 4 for intermediate lifters and 4 to 5 for advanced lifters (Ratamess et al., 2009). It gives no set and rep ranges for the corner row itself, so treat the table below as a practical starting point. Your foot distance from the corner and the length of the squeeze are the main ways to progress.
| Level | Sets × Reps | Rest between sets | Frequency |
|---|---|---|---|
| Beginner (the corner row as in the app) | 2–3 × 10–15 | 60–90 seconds | 2–3 sessions/week |
| Harder (feet farther from the corner) | 3 × 8–12 | 90–120 seconds | 2–3 sessions/week |
| Hardest (feet farther out and a longer hold) | 3–4 × 6–10 | 90–120 seconds | 2–3 sessions/week |
Where in your workout: Corner rows fit well near the beginning of an upper-body session, when your upper back is fresh. Pair them with push-ups for a balanced push and pull pairing.
Form floor over rep targets: if your last 2 reps of a set break form (hips sagging, shoulders shrugging, elbows sliding down the walls), stop the set there. Hitting a target rep count with broken form is worse than hitting fewer reps cleanly.
How FitCraft Programs This Exercise
Knowing how to do a corner row is step one. Knowing when to do it, which variation matches your level, and when to progress is where most people get stuck.
FitCraft handles that. During your personalized diagnostic assessment, the app maps your fitness level, goals, and available equipment. Then it builds a balanced training plan for your level, and the corner row is one of the exercises it can include, with an interactive 3D demonstration. The app has one corner row, rated Beginner, and its bodyweight row on a suspension trainer (Intermediate) is a step up.
As you get stronger, the app adjusts your training to match your level. Every program is designed by an Ivy League-trained exercise scientist and NSCA-certified strength coach using evidence-based periodization, then adapted to you by the AI. The 3D demonstration is especially useful for this exercise because it shows where your arms touch the walls and how far you lean back, details that are easier to see than to learn from text alone.
Frequently Asked Questions
Can I do corner rows if I have shoulder pain?
Not while your shoulder hurts. A burn in the muscles between your shoulder blades and at the backs of your shoulders is normal, but any pain in your shoulder, elbow, neck, or lower back means stop. If your shoulder hurts, see a doctor or physical therapist before you do corner rows again, and get clearance from your surgeon if you have had recent shoulder surgery.
What muscles do corner rows work?
Corner rows primarily work the middle trapezius, rhomboids, and posterior deltoids: the middle trapezius and rhomboids squeeze your shoulder blades together, and the posterior deltoids draw your upper arms back into the walls. The latissimus dorsi and lower trapezius help: the lats help a little to draw your arms back while your elbows stay at shoulder height, and more if your elbows drop lower, while the lower trapezius keeps your shoulder blades down.
How is a corner row different from a regular bodyweight row?
A bodyweight row, or inverted row, has you lean back holding the handles of a suspension trainer or a bar and pull your chest up to them with your hands. A corner row is done standing with your back to an inside wall corner: the backs of your upper arms rest on the two walls at about shoulder height, and you press your elbows back into the walls to push your body away from the corner. Your hands grip nothing and you lean back only a little. The FitCraft app rates the corner row Beginner and its bodyweight row on a suspension trainer Intermediate, so the corner row is the easier place to start.
How many corner rows should I do?
Start with 2 to 3 sets of 10 to 15 reps, holding the squeeze for a moment on each rep. Your foot distance sets the difficulty: closer to the corner is easier and farther out is harder. When 3 sets of 15 feel controlled, walk your feet a little farther out or hold the squeeze longer, or move on to bodyweight rows on a suspension trainer.
Are corner rows good for fixing posture?
Corner rows strengthen the muscles that pull your shoulder blades together and draw your arms back, the ones that hold your shoulders back: the middle trapezius, rhomboids, and posterior deltoids, with the lats and lower trapezius helping. You do them standing with no equipment, so they are an easy upper-back exercise to fit into a day spent at a desk. No single exercise fixes posture on its own, so treat them as one part of a balanced program.